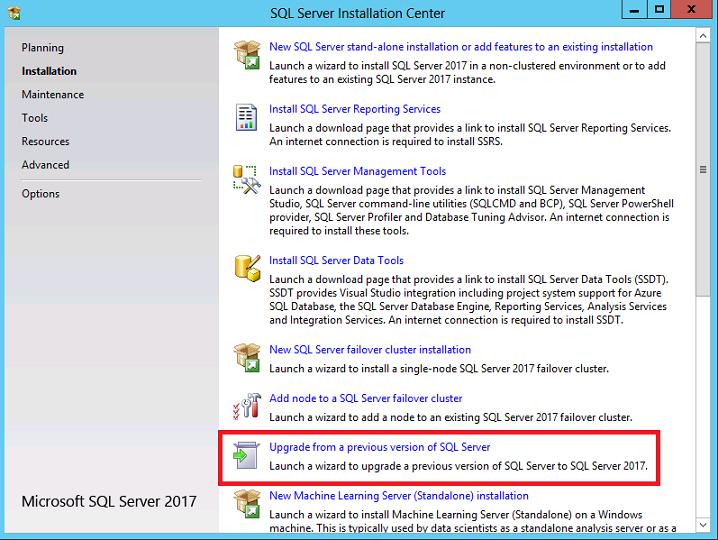
Procedure to Upgrade.
Download SQL Server 2017
media and run SQL Server setup
program. Once SQL Server setup appears on screen, choose "Installation" on the
left panel, and then choose the "Upgrade from a previous version of SQL Server"
option.
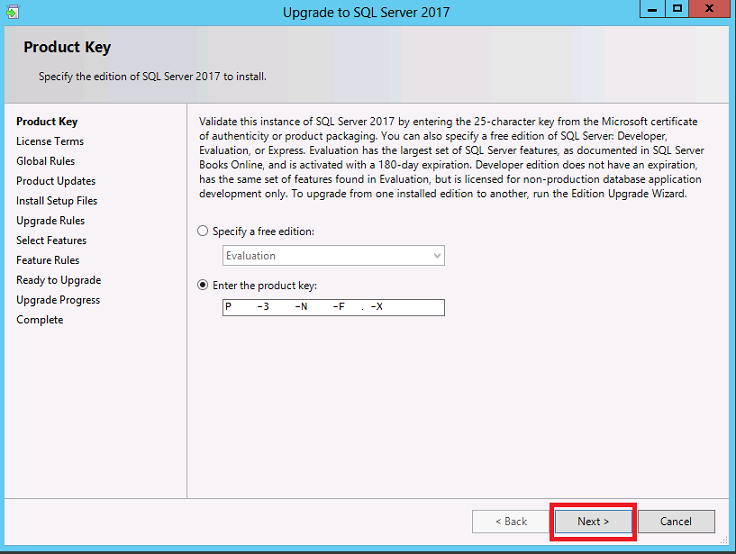
On the page below, specify the edition of SQL Server to install or provide a product key. Sometimes the product key is
included in the media (product key is pre-pidded).
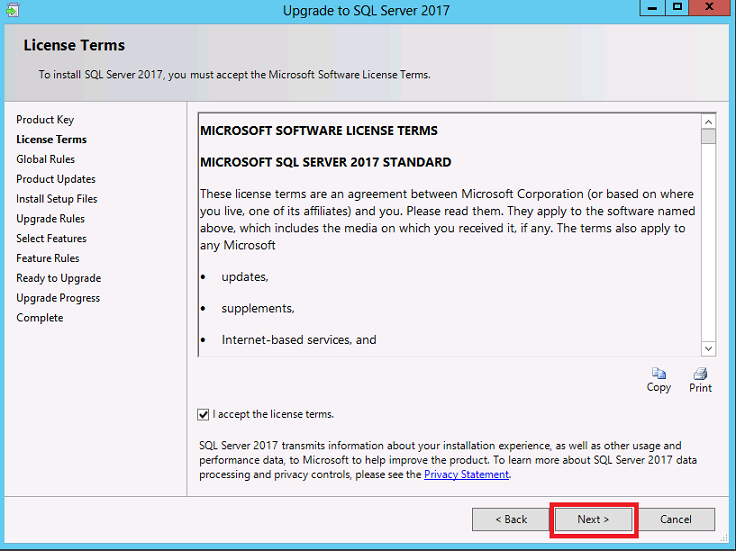
The page below is the License Terms page. Read the
license agreement and if you agree with it, check the "I accept the license terms"
check box, and then click the Next
button.
In the Global Rules page SQL Server setup will automatically advance to the next
page if there are no rules errors. These global rules verify privileges of the
user installing SQL Server, if setup is running as Administrator, if a computer
restart is needed. These rules also verifies the health of the WMI service, runs
a consistency validation of registry keys, verifies updates required for .NET
Framework among other verifications that are performed on this step.

On the Product Updates page, the latest available SQL Server product updates
are displayed. If you don't want to include the updates, clear the Include SQL
Server product updates check box. If no product updates are discovered, SQL
Server Setup does not display this page and auto advances to the Install Setup
Files page.
On the Install Setup Files page, Setup provides the progress of downloading,
extracting, and installing the Setup files. If an update for SQL Server Setup is
found, and is specified to be included, that update will also be installed.
In the Upgrade Rules window, the setup procedure will automatically advance to
the Select instance window if there are no rule errors.
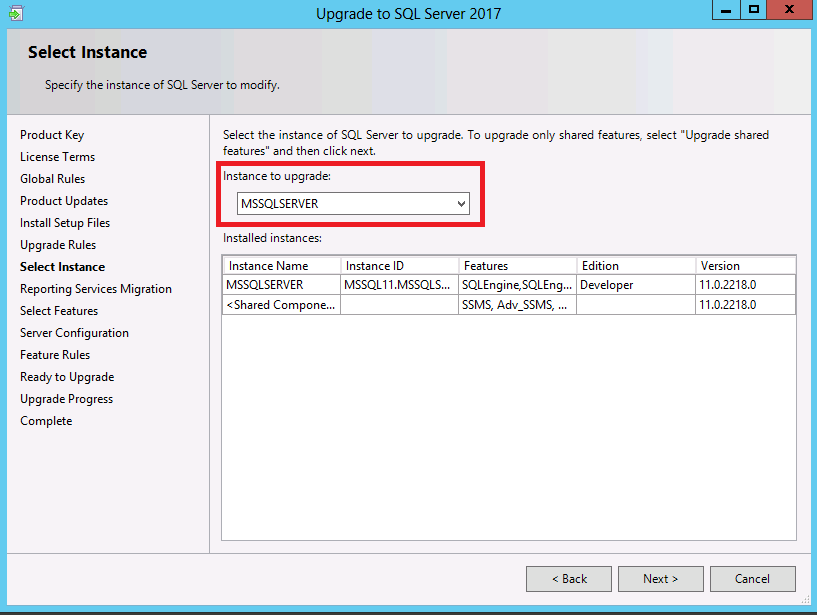
On the Select Instance page, specify the instance of SQL Server to upgrade.
To upgrade Management tools and shared features, select Upgrade shared features
only.
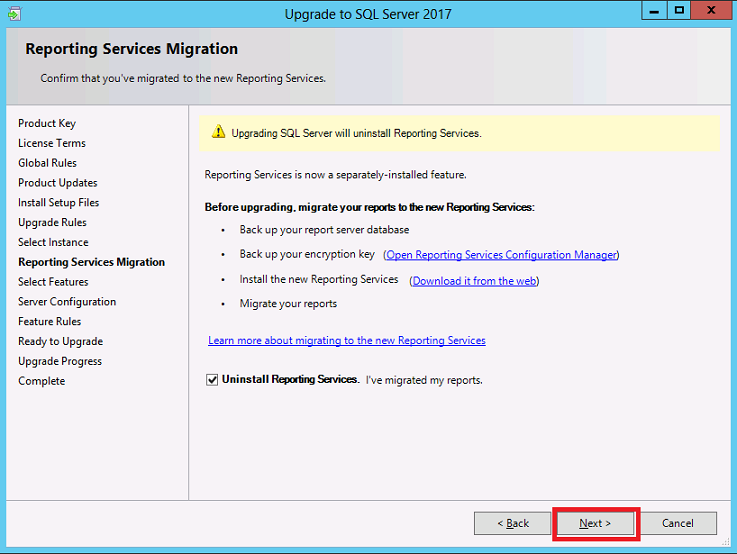
On the "Reporting Services Migration" page, SQL Server setup is letting you
know it will uninstall Reporting Services (SSRS). Backup the Report Server
database and the related encryption key. After finishing the upgrade to SQL
Server 2017 you can visit link provided on this page ("Download it from the web)
to download and install the new SSRS. Make a click on the Next button when ready
and SSRS will be uninstalled as part of the upgrade to SQL Server 2017.
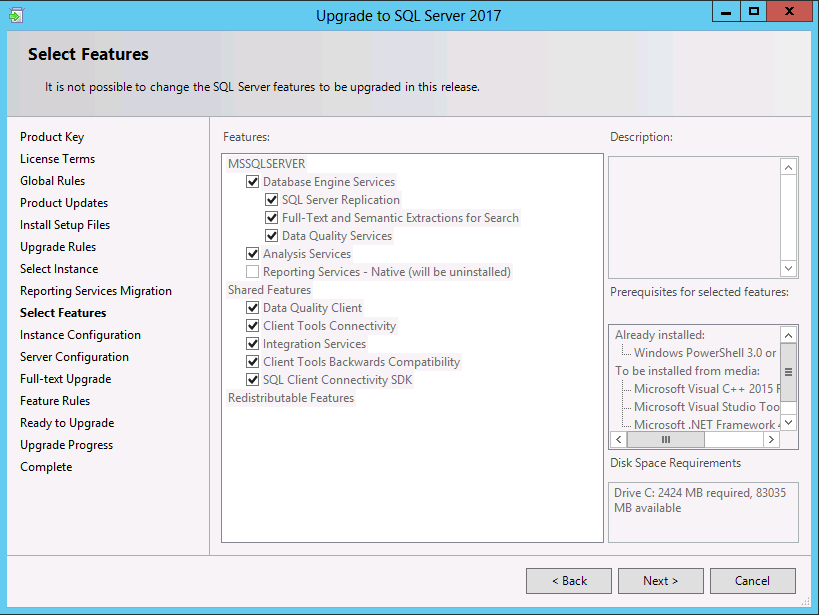
On the Select Features page, the features to upgrade will be preselected. A
description for each component group appears in the right pane after you select
the feature name.
The prerequisites for the selected features are displayed on the right-hand
pane. SQL Server Setup will install the prerequisite that are not already
installed during the installation step described later in this procedure.
If you have opted to upgrade the shared features by selecting <Upgrade shared
features only> on the Select Instance page, all the shared features are
preselected on the Feature Selection page. All the shared components are
upgraded at the same time.
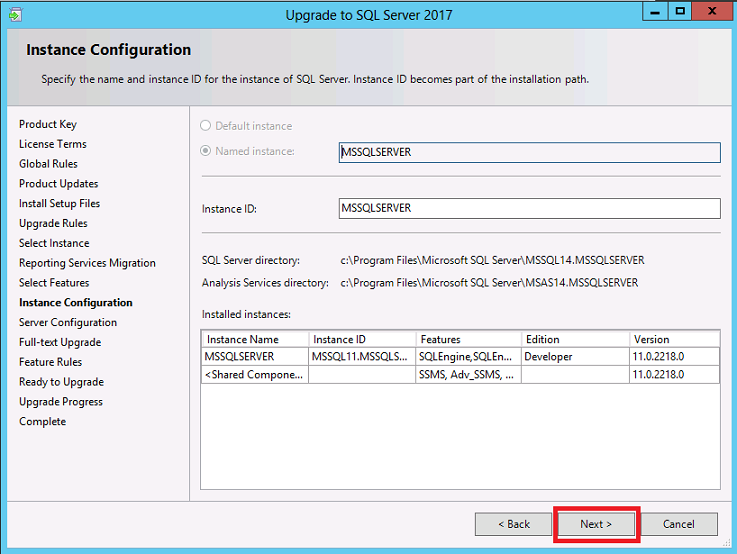
On the Instance Configuration page, specify the Instance ID for the instance of
SQL Server. If only one SQL Server installation (instance) is present in the
computer, the instance name will be preselected, and you just need to click the
Next button.
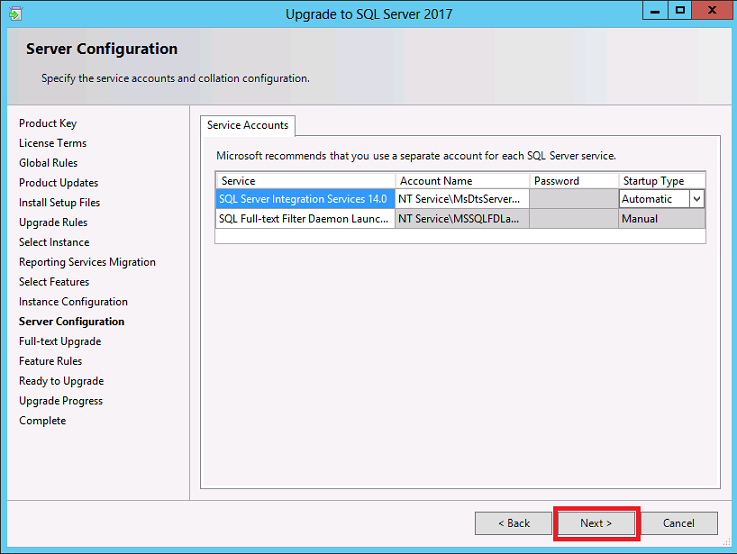
On the Server Configuration - Service Accounts page, the default service
accounts are displayed for SQL Server services. The actual services that are
configured on this page depend on the features that you are upgrading.
Authentication and login information will be carried forward from the previous
instance of SQL Server. You can assign the same login account to all SQL Server
services and click on the Next button, or you can configure each service account
individually. You can also specify whether services start automatically, are
started manually, or are disabled. Microsoft recommends that you configure
service accounts individually so that SQL Server services are granted the
minimum permissions they have to have to complete their tasks.
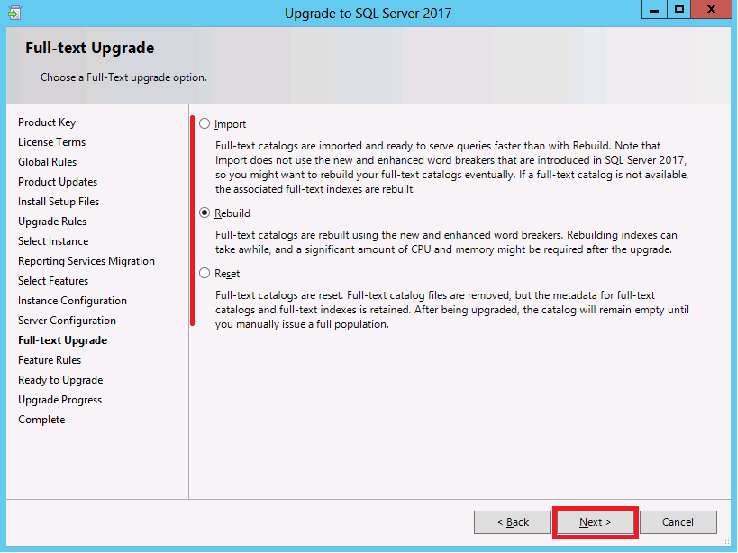
On the Full-Text Search Upgrade Options page, specify the upgrade options for
the databases being upgraded. We chose to rebuild, but you can read
this documentation for things you need to consider when choosing a full-text
upgrade option.
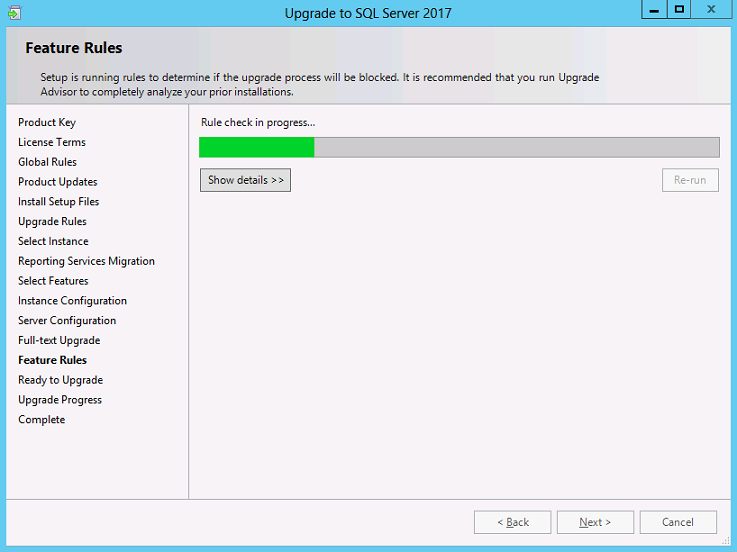
The Feature Rules window will automatically advance if all rules pass. These
rules will check if your current SQL Server installation meets all the software
requirements we mentioned at the beginning of this article.
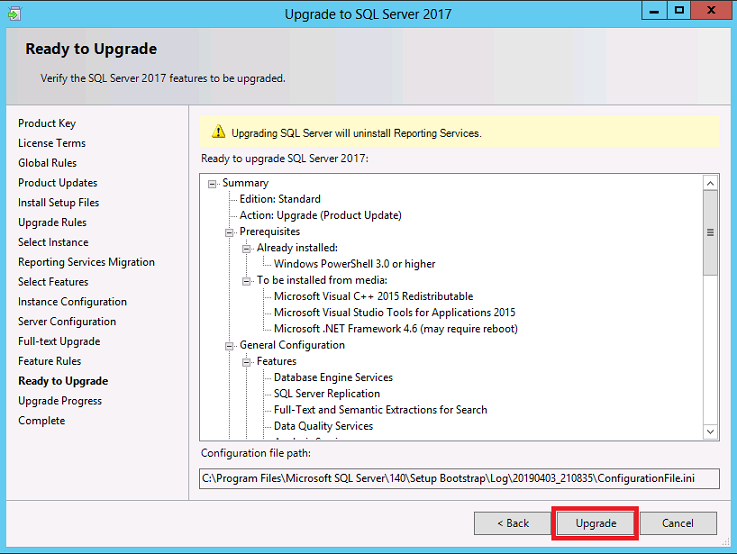
The Ready to Upgrade page displays a tree view of installation options that were
specified during Setup. To continue, click the Upgrade button.
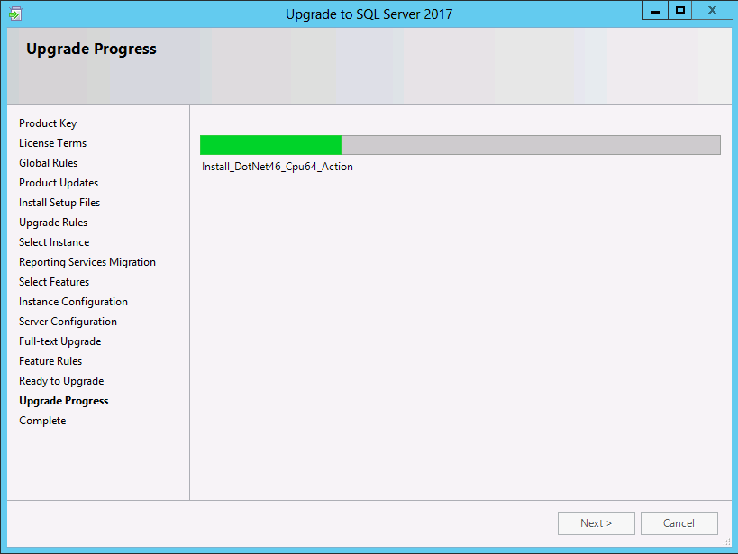
During installation, the progress page provides status so that you can monitor
installation progress as Setup continues.
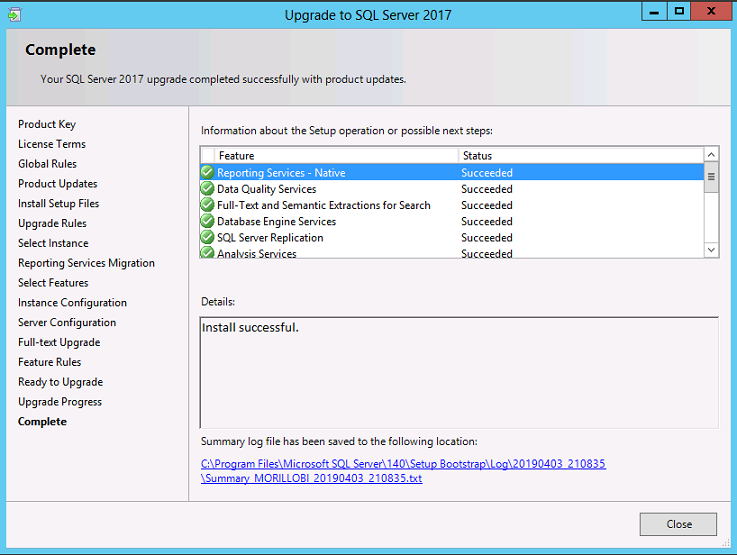
After installation, the Complete page provides a link to the summary log file
for the installation and other important notes. To complete the SQL Server
installation process, click Close.
If you are instructed to restart the computer, do so now. It is important to
read the message from the Installation Wizard when you have finished with Setup.
For more information, about upgrading to SQL Server 2017, please read
this documentation.
![[Company Logo Image]](images/SQLCofee.jpg)
