Restore - Timeline
Applies to: SQL Server 2012, SQL Server Denali.
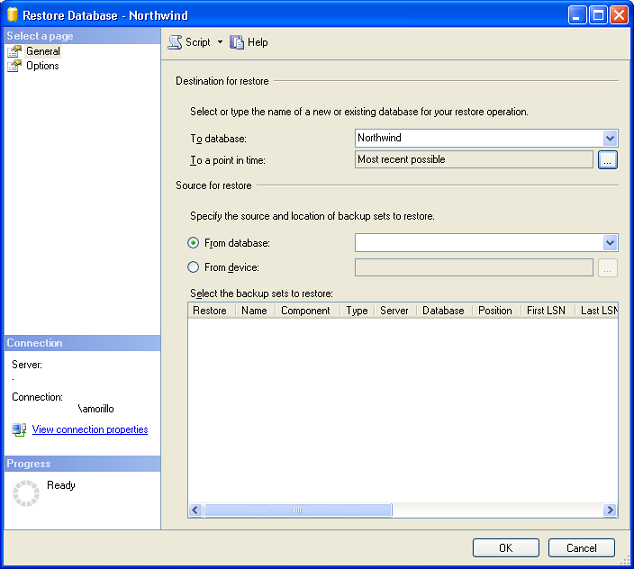
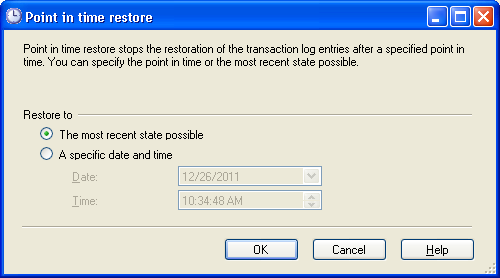
On previous versions of SQL Server when you want to restore or recover a
database to a particular point in time within a transaction log, to a particular
named mark inserted on a transaction log record, or to a specific log sequence
number, you have to use a Point-in-time Restore. If you are familiar with this
type of restores then you have seen the following dialogs:
On SQL Server 2012 (Denali), when a point-in-time restore is needed, just click
the button named "Timeline", this opens the new Backup Timeline dialog box,
which makes it easier and more friendly to locate and specify backups for a
Point-in-time restore.
The steps to restore a database using Timeline are the following:
1. When you open SQL Server Management Studio, to restore a database just make a
right click on database, select "Tasks", then select "Restore", and then select
"Database". This will open the "Restore Database" dialog box.
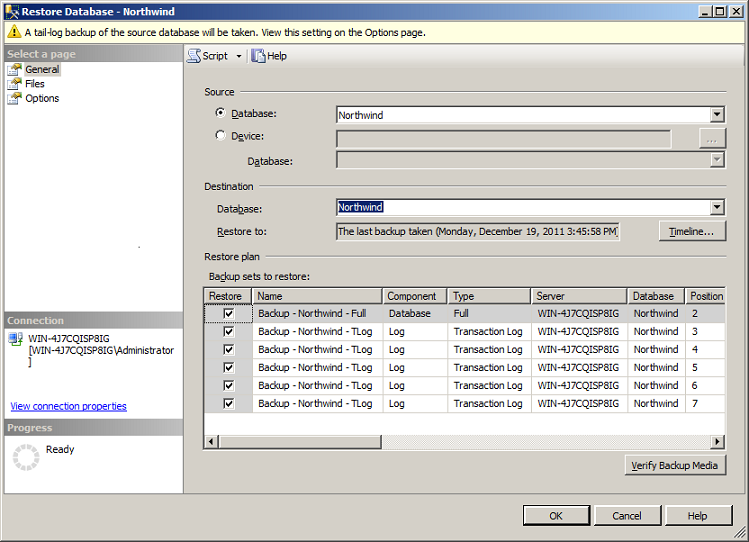
The warning at the top of the dialog may indicate that a tail-log backup may be
taken before the restore operation. Please see the Tail-log Backup section.
2. On the General page, leave the database textbox as is, and click on the
Timeline button to access Backup Timeline dialog.
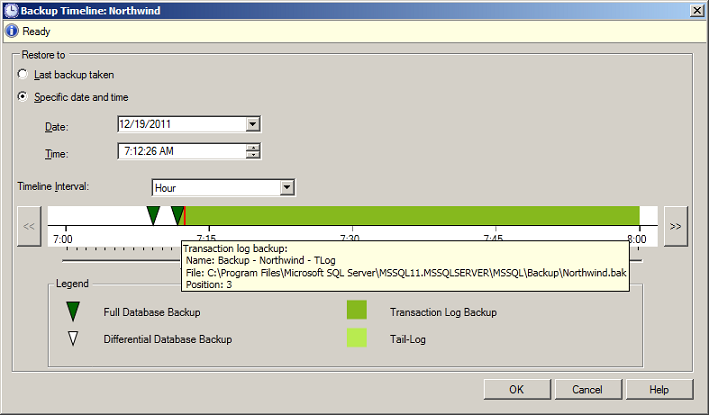
3. Select the point in time to stop the recovery action. By default, the
database will be restored to the last backup taken.
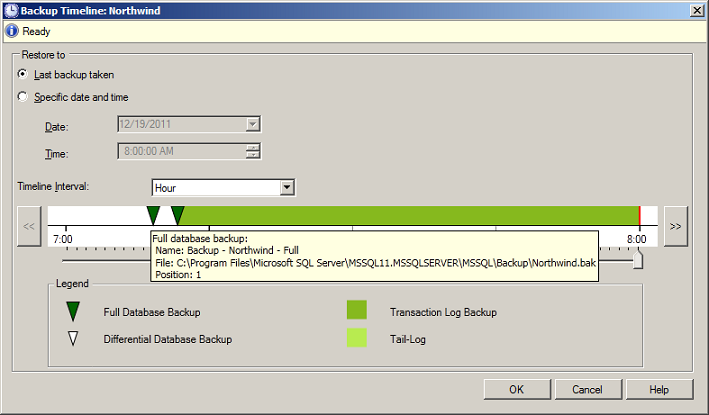
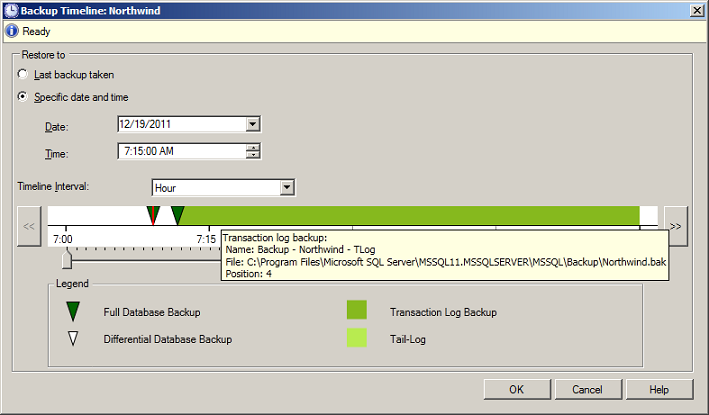
See the legend on dialog above to understand the timeline. Scroll the timeline
to identify points in the timeline you can restore to.
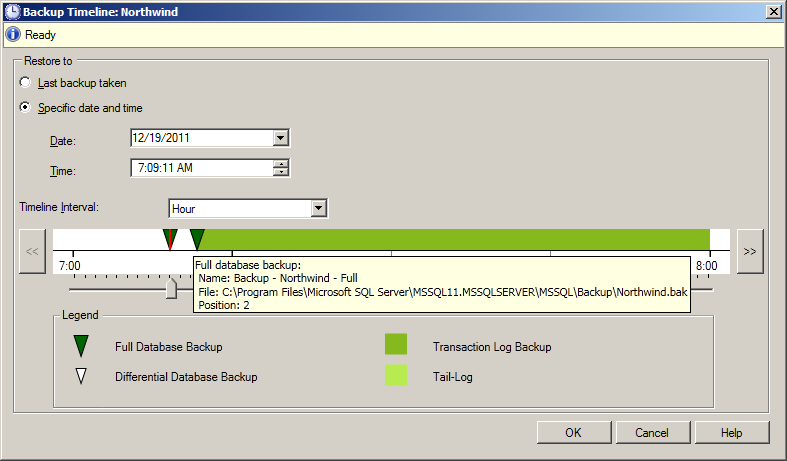
On the dialog above, we selected the first full database backup by making a
double click on the first green triangle from left to right.
Move the mouse over the timeline to identify available points to restore to.

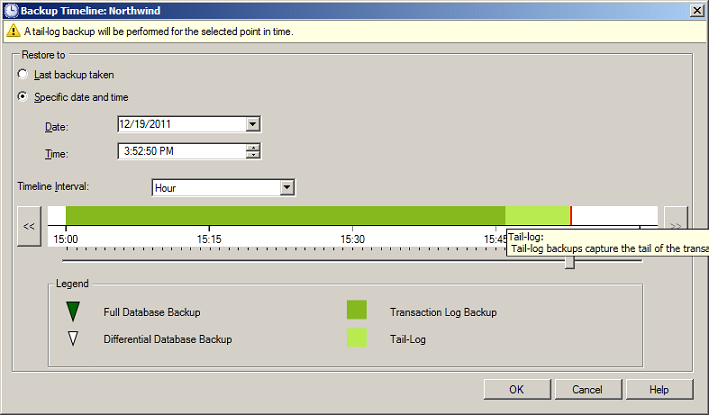
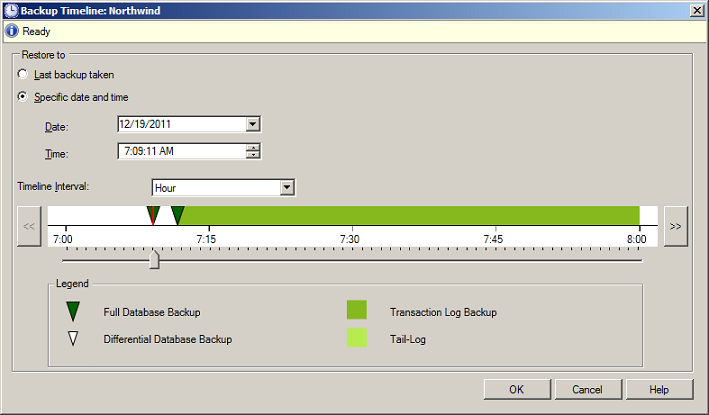
On the following screenshot, we selected another point to restore, by making
double click on the timeline.
4. On the "Backup sets to restore" section, select the backups to restore or
keep the suggested recovery plan.
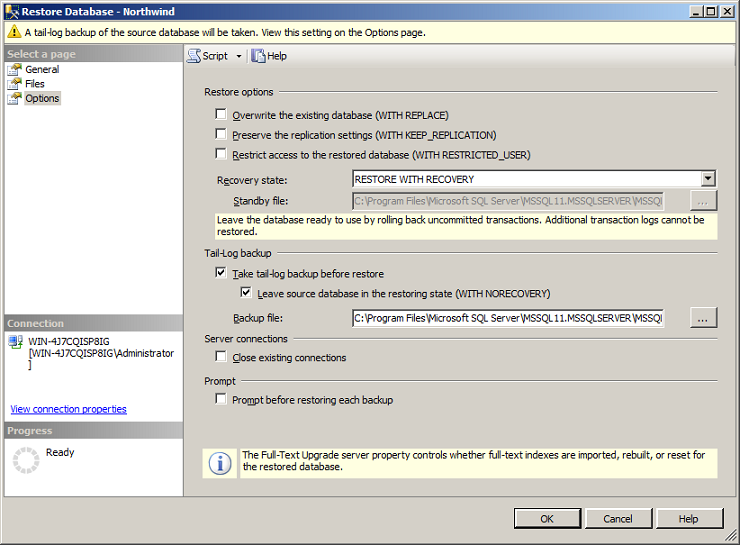
5. Click on "Files" on the left panel of the Restore Database dialog, to access
the Files dialog if needed.
6. Click on "Options" on the left panel of the Restore Database dialog, to
access advanced options. Review the "Restore Options" section and verify the
desired "recovery state" is selected.
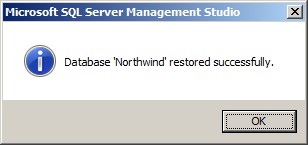
7. Click the OK button to restore the database.
![[Company Logo Image]](images/SQLCofee.jpg)
