For detailed information about Microsoft SQL Server 2008 RC 0 system
requirements, please visit
this
web site.
For those of you who previously installed a CTP version of Microsoft SQL Server
2008, the following are my recommendations before installing Microsoft SQL Server
2008 RC 0:
- Uninstall Microsoft SQL Server 2008 CTP
- Uninstall .Net Framework 3.5
- Uninstall .Net Framework 2.0
- Uninstall .Net Framework 1.0
- Rename the .Net Framework 3.5 folder located in C:\WINDOWS\Microsoft.NET\Framework\v3.5
to v3.5old.
- Rename the .Net Framework 2.0 folder located in C:\WINDOWS\Microsoft.NET\Framework\v2.0.50727
to v2.0.50727old.
- Rename the .Net Framework 1.0 folder located in C:\WINDOWS\Microsoft.NET\Framework\v1.0.3705
to v1.0.3705old.
- Remove the folder "Microsoft SQL Server" from the "Program files" folder,
or at least remove the following files from the "C:\Program Files\Microsoft
SQL Server\MSSQL10.MSSQLSERVER\MSSQL\DATA" directory: ReportServer.mdf,
ReportServer_log.LDF, ReportServerTempDB.mdf, ReportServerTempDB_log.LDF.
- Install Microsoft SQL Server 2008 RC 0. Setup will install .Net Framework
3.5 prior installation.
The following images show how to install SQL Server 2008 RC 0 from a
self-extracting executable file downloaded for a 32-bit system. Once you
download the file, execute it and you will be prompted to choose a location to
extract the files to, which you can change as we did.
After the extraction finishes, go to the directory that you extracted the
files to. Locate and double-click Setup.exe to begin the installation. The
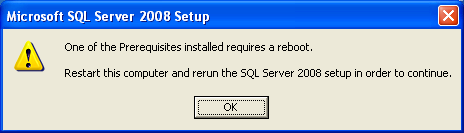
following message will appear on your screen:
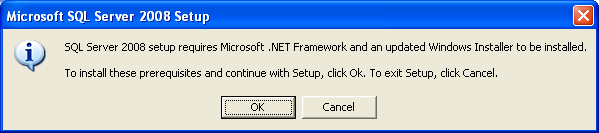
Click OK to proceed to the installation of the prerequisites specified.
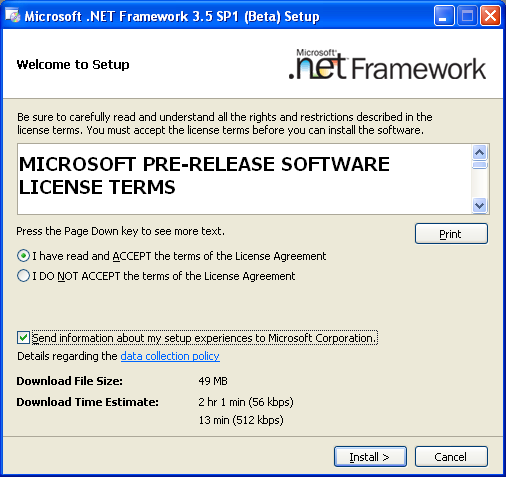
The above is a welcome screen that shows a license agreement. Read the
license agreement and if you agree with it, select the "I have read and accept
the terms of the License Agreement" radio button, and then click the Install
button.
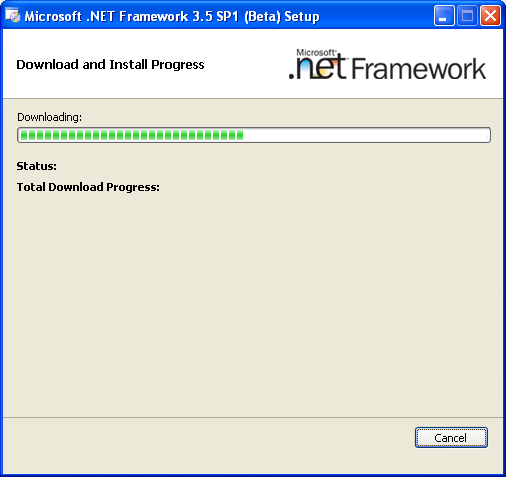
The above screen shows that Setup has started to download software needed to
start the installation.
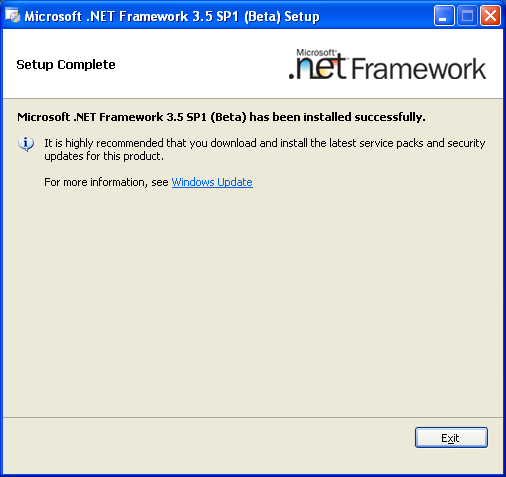
Once the Setup program completes the Framework installation, the screen above
will appear on your screen. Click the "Exit" button to complete this
stage.
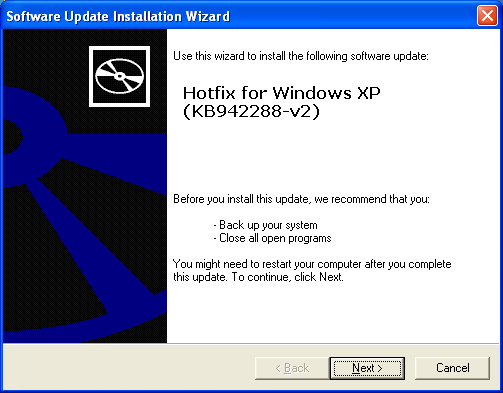
The above screen belongs to the wizard used to install the Windows Installer
4.5, required by Microsoft SQL Server RC 0. For more information about
this update click here.
To continue the installation of this update on the "Next" button.

On the screen shown above, read the license agreement and if you agree with it,
select the "I agree" radio button and click on Next.
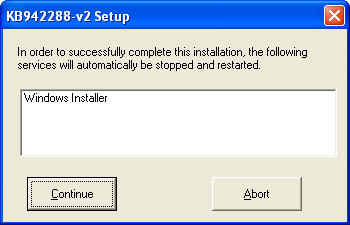
If you receive the above screen just click on "Continue".
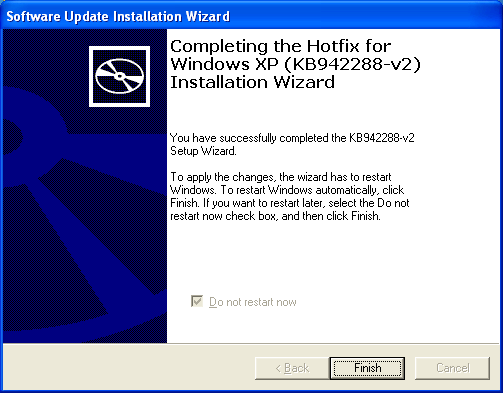
The page above announces that installation of Windows Installer 4.5 has finished
and your computer need to be restarted. Click on the "Finish" button to
restart your machine.
After restarting your computer, run Microsoft SQL Server 2008 setup again.
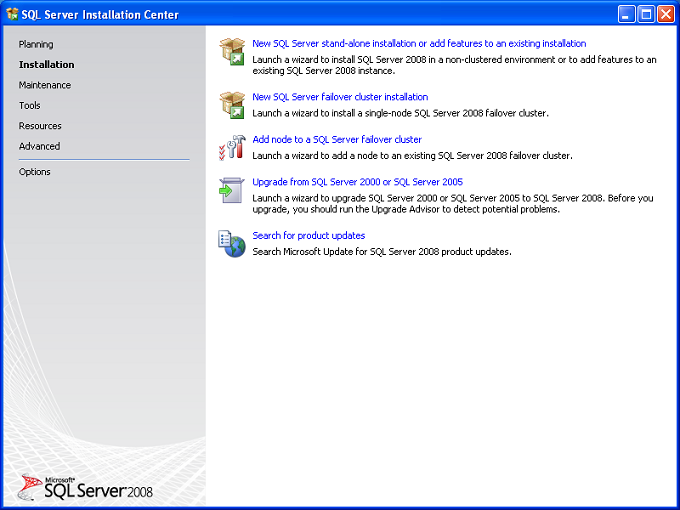
The SQL Server Installation Center screen will show up.
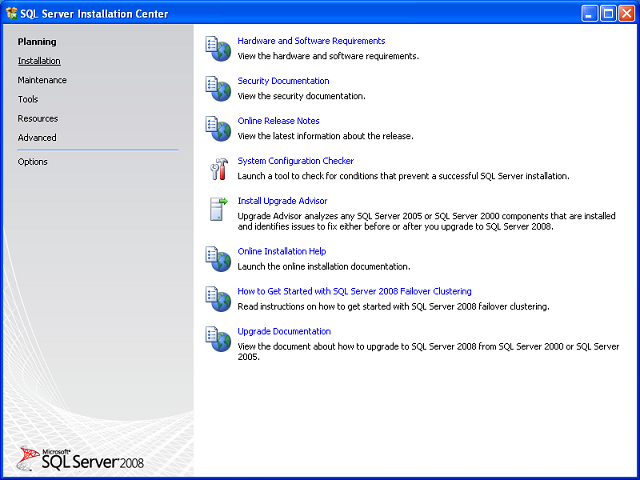
On the screen above, make a click on the "Installation" hyperlink in the left
side of the screen.

This screen shows the types of installation available. Let's select the
first type available "New SQL Server stand-alone installation or add features to
an existing installation".
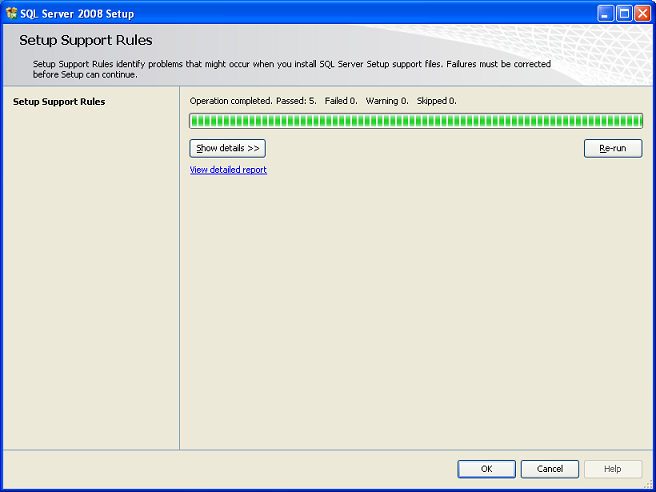
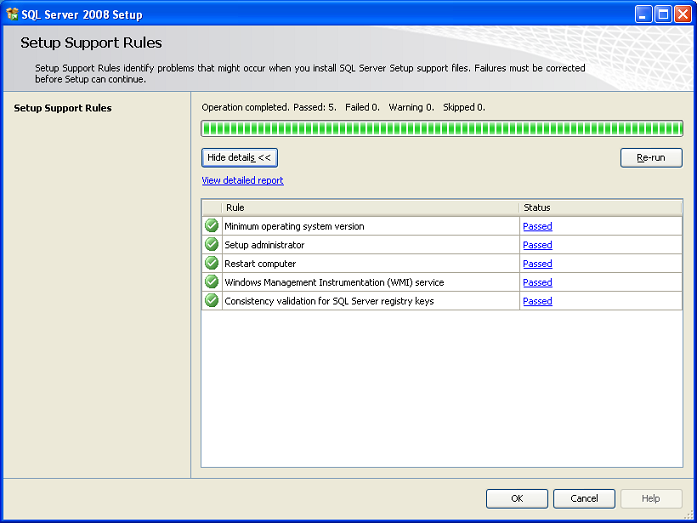
The above screens belong to the first set of Setup Support Rules.
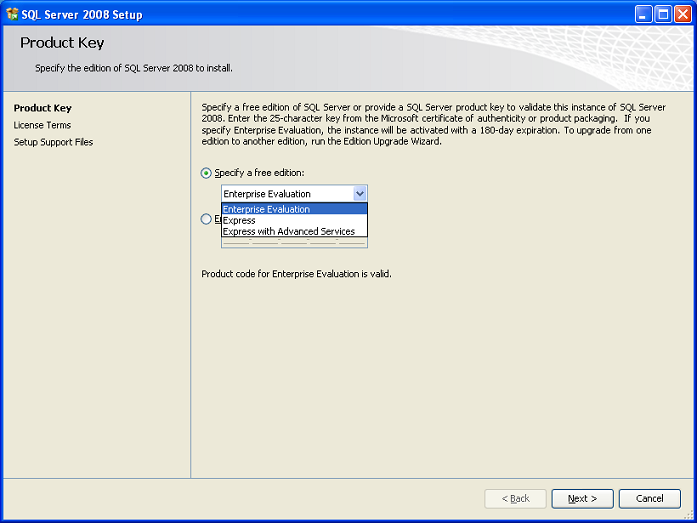
On the page above, specify the edition of SQL Server to install. We chose
the Enterprise Evaluation Edition.
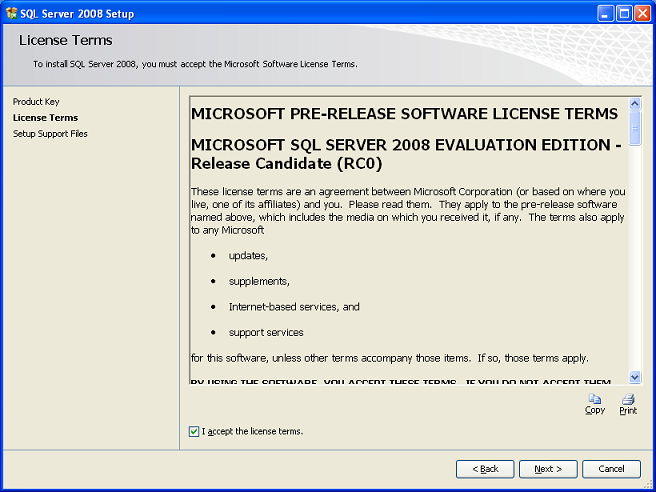
The above is the License Terms page. Read the
license agreement and if you agree with it, check the "I accept the license terms"
check box, and then click the Next
button.
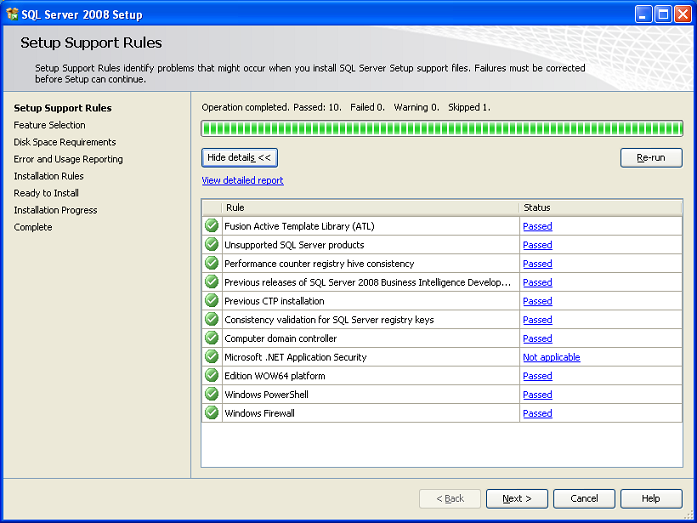
The above screens belong to the second set of Setup Support Rules.
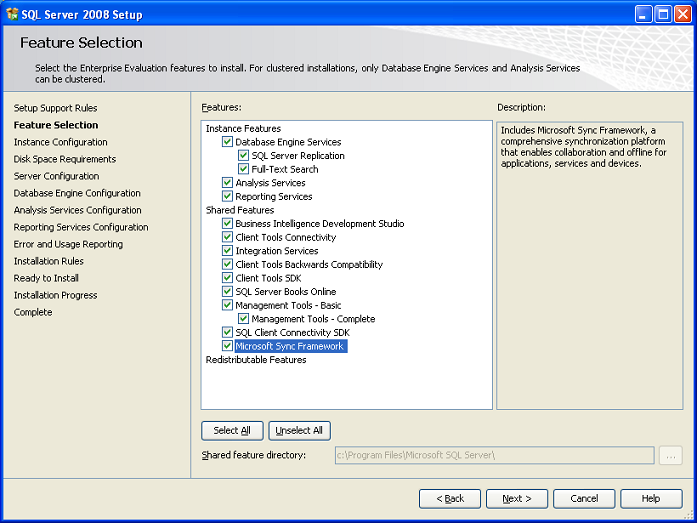
On the Feature Selection page, select the features for your installation.

On the Instance Configuration page, select a default or named instance for
your installation, and select de directory where you want to install de features
you have chosen.
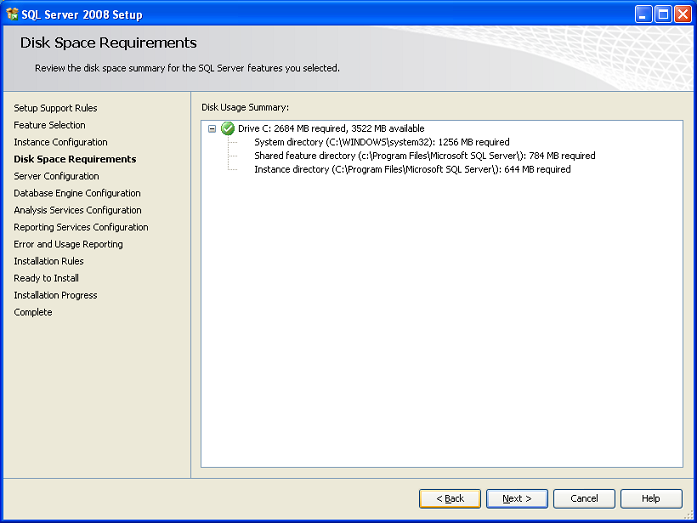
This page is just for the purpose of reviewing disk usage. Click on the
"Next" button to continue setup.
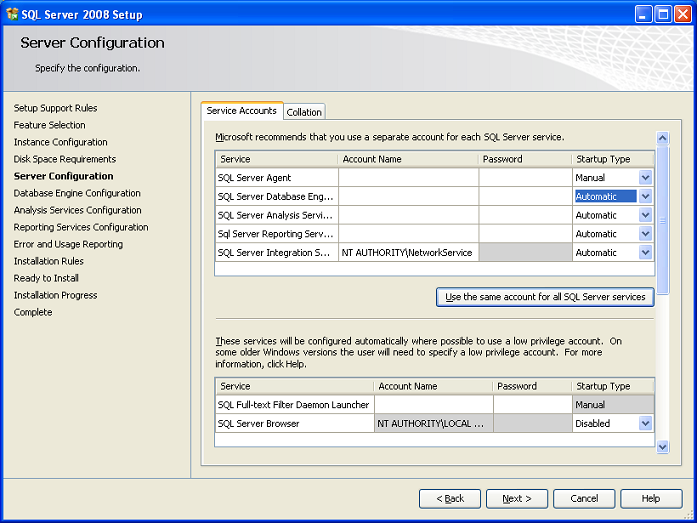
Microsoft recommends you to specify an individual account for each service. The
service accounts used for this configuration must have a strong password,
otherwise you will get the error "Invalid or missing username or password. To
continue, provide valid credentials for the SQL Server Agent service". A
strong password is one that has a combination of letters in uppercase,
lowercase, numbers and special characters.
For the purpose of this article, we chose to use the same service account for
all services, except for the SQL Server Integration Services, thus we click on
the "Use the same account for all SQL Server services" button.
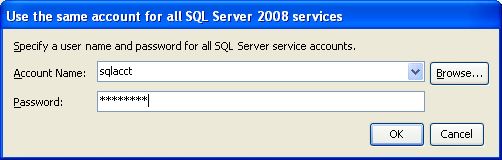
After the password was provided, we change the account name for SQL Server
Integration Services to its default service account, which is the Network
Service account.
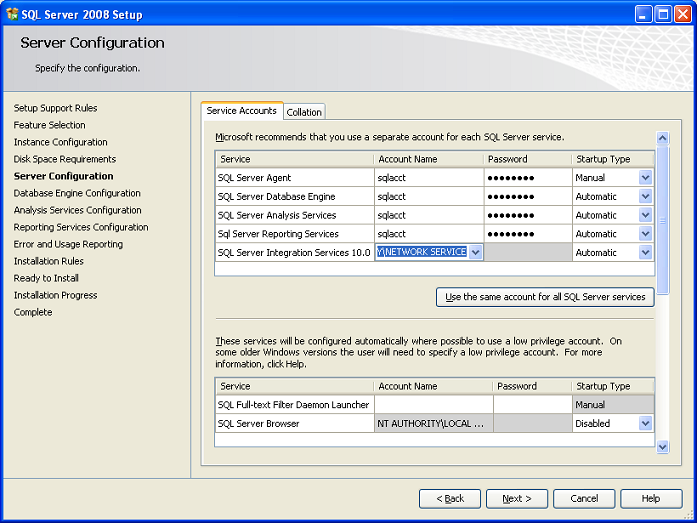
On the Collation tab, specify the collation for your SQL Server instance.
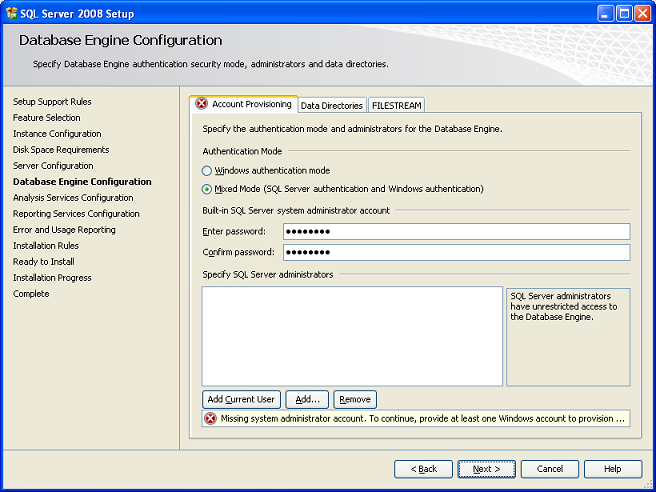
On the Database Engine Configuration page, choose the authentication mode to
use for your SQL Server installation. If you select Mixed Mode, Setup creates an sa account.
Enter and confirm the password for
the (sa) login when you choose Mixed Mode Authentication.
You will get the error "Missing system administrator account. To continue,
provide at least one Windows account to provision ...", if you fail to provide
SQL Server administrators and try to continue with the next page of Setup.
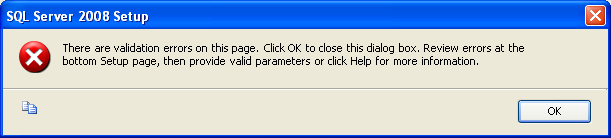
The error message "There are validation errors on this page ..." will also
appear. Click the buttons "AddCurrent User" or "Add ..." to provide at least
one account that will have unrestricted access to the SQL Server instance.

Now, you can click on "Next".

On this page, provide user account that will be Analysis Services
administrators.
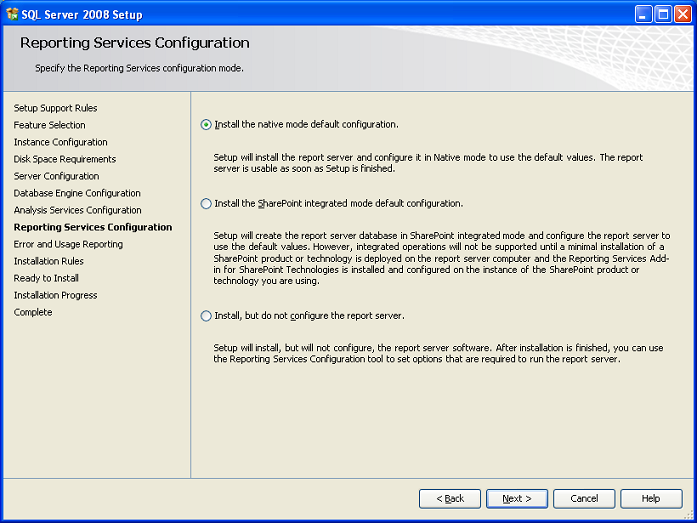
If you selected Reporting Services as a feature to install, the Report
Services Configuration page is displayed. Here we chose to install
Reporting Services on Native mode.
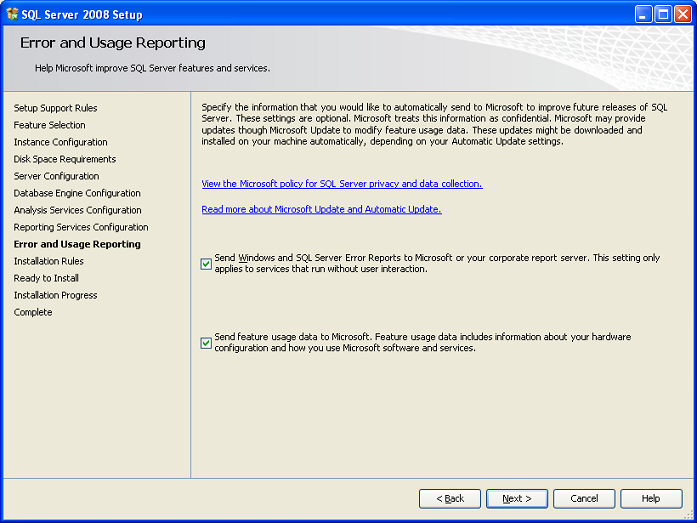
On the Error and Usage Reporting page, optionally clear each check box to
disable error reporting.
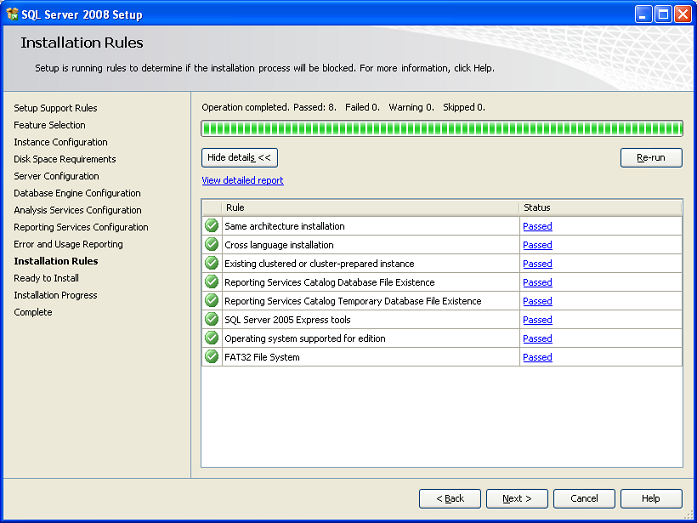
The above dialog belongs to the Setup Installation Rules.
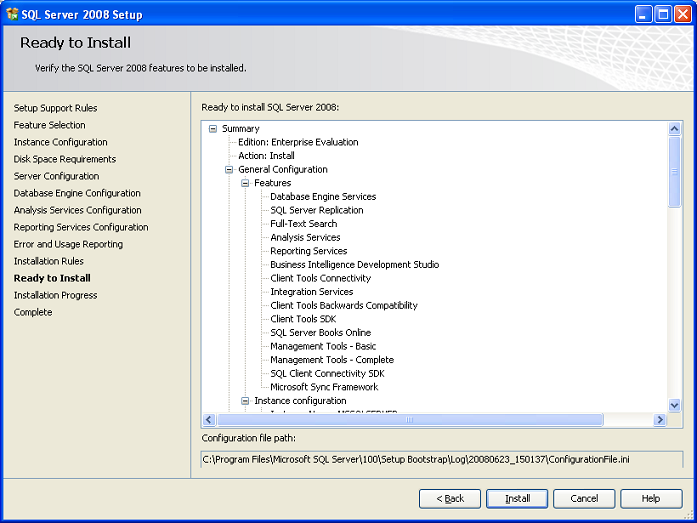
On the Ready to Install page, review the summary of features and components for
your SQL Server installation. To proceed, click Install.
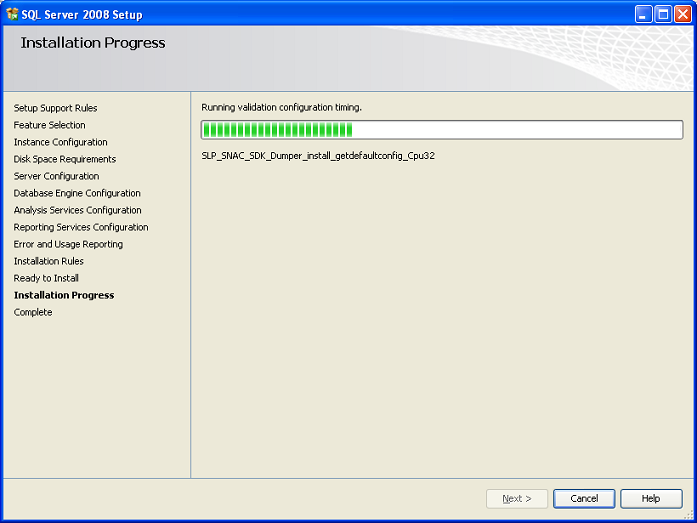
On the Installation Progress page, you can monitor installation progress as
Setup proceeds.
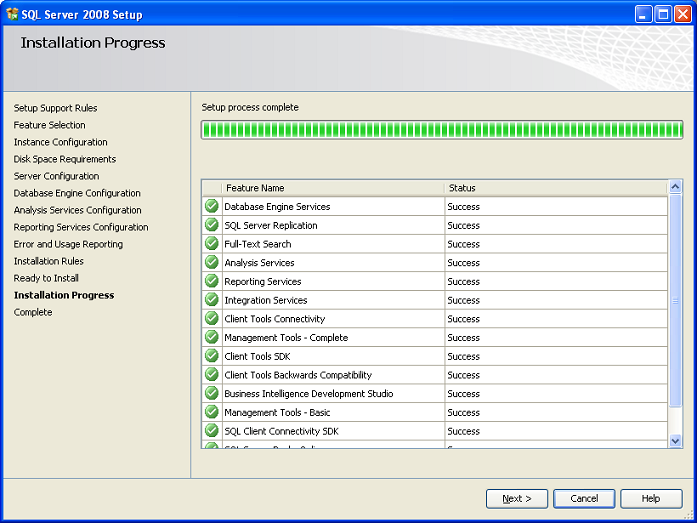
Click on the "Next" button, when Setup process complete.
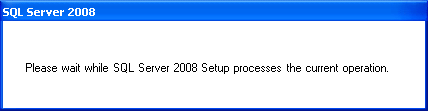
Please wait until this dialog disappear.
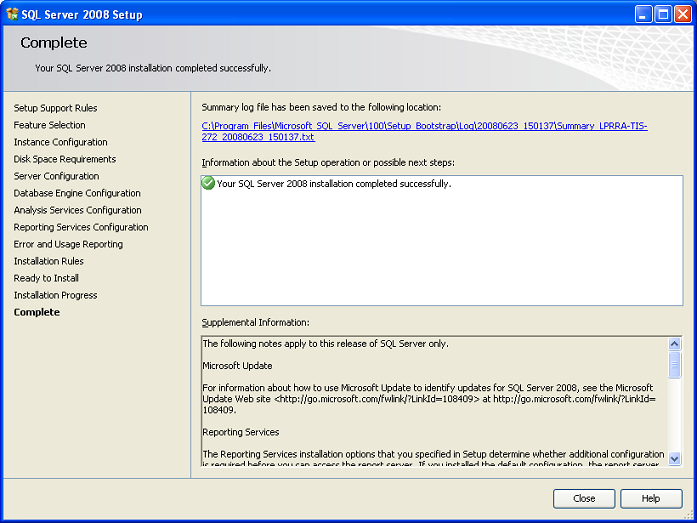
On the Completing the Microsoft SQL Server Installation Wizard page, you can
view the Setup summary log by clicking the link provided on this page. To exit
the SQL Server Installation Wizard, click Close.
Close the SQL Server Installation Center and open the SQL Server Configuration
Manager.
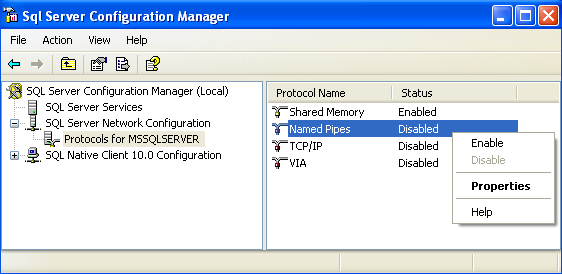
Enable the appropriate protocols.
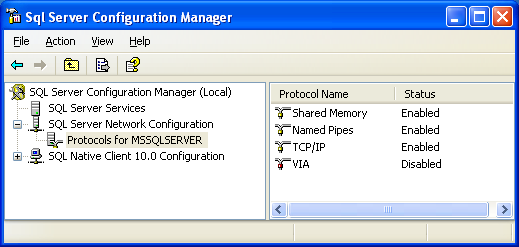

Restart the MSSQLSERVER service.
![[Company Logo Image]](images/SQLCofee.jpg)
