How to Install Master Data Services
Applies to: SQL Server 2012 Enterprise Edition, Windows Server 2012
Standard Edition.
This article is about how to add Master Data Services (MDS) to an existing SQL
Server 2012 instance. Before starting the step-by-step procedure make sure each
requirement for MDS has been met as explained
here.
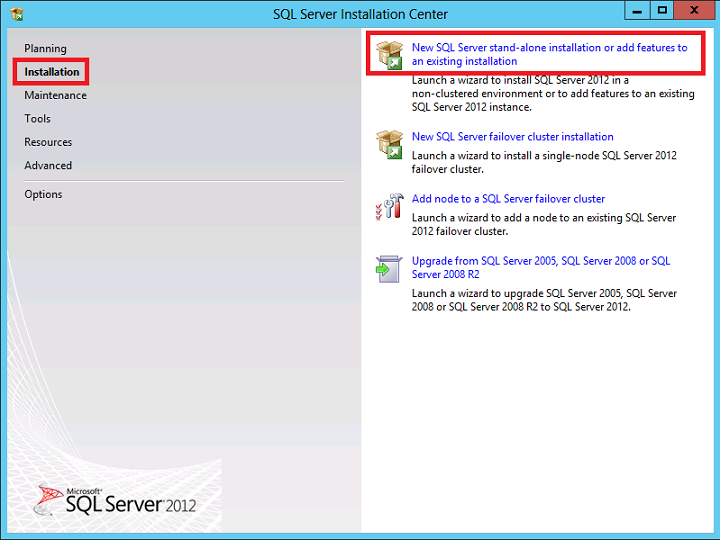
Next, run SQL Server setup program from the SQL Server installation media, select
the Installation option in the left-hand navigation area, and then click on "New
SQL Server stand-alone installation or add features to an existing
installation".
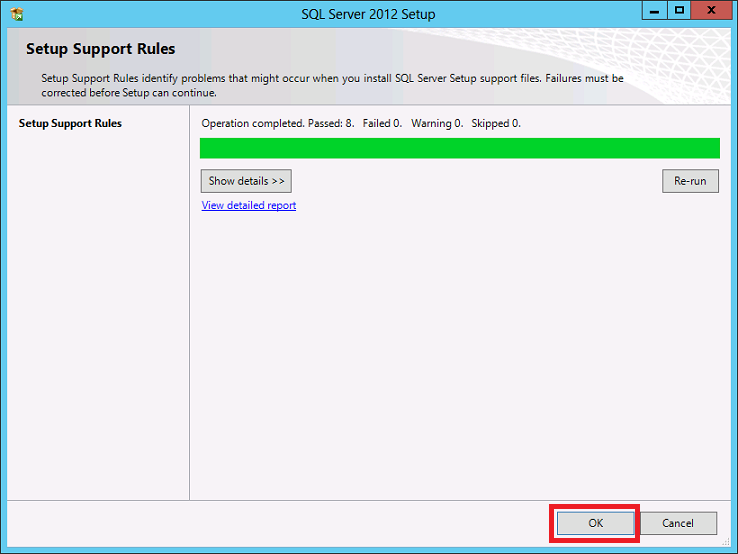
Below you will find the first set of Setup Support Rules. The Next button is
available only if all check results are successful, or if failed checks do not
block installation.
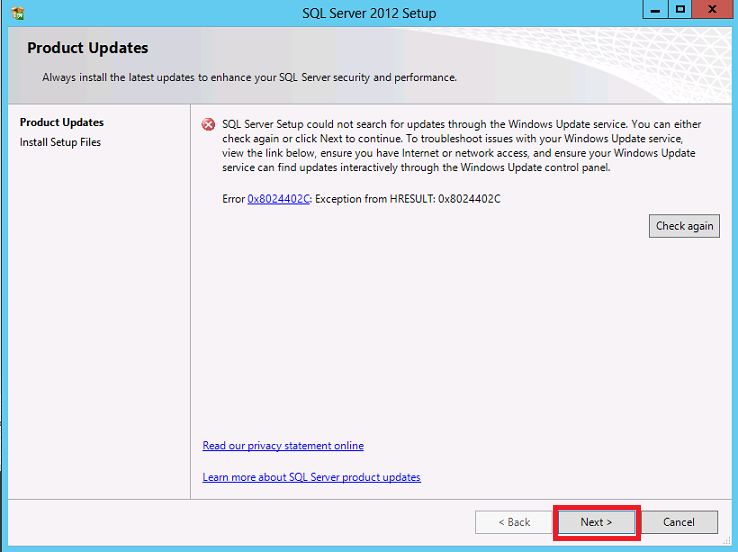
Access to the Internet is required, since SQL Server setup will try to get
updates for SQL Server during installation. If the computer does not have access
to the Internet and Windows Update service, then you may get the below error
message:
"SQL Server Setup could not search for updates through the Windows Update
service. You can either check again or click Next to continue. To troubleshoot
issues with your Windows Update service, view the link below ensure you have
Internet or network access, and ensure your Windows Update service can find
updates interactively through the Windows Update control panel
Error 0x80240042: Exception from HRESULT: 0x80240042."
Click on the Next button if you get this error on the Product Updates screen.
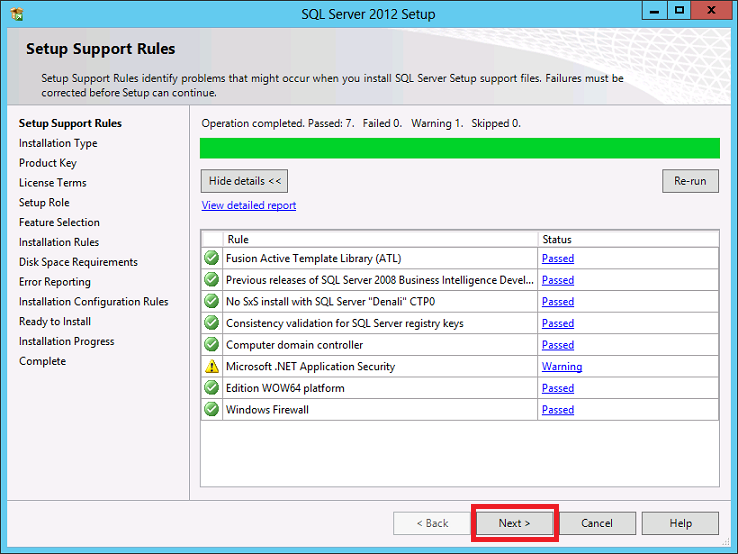
The below screen belong to the second set of Setup Support Rules.
About the Windows Firewall warning, you can go ahead with the installation of
SQL Server, but when it finishes configure your Windows Firewall to allow SQL
Server access or disable it. Click
here to
know how to configure Windows Firewall for SQL Server access.
About the Microsoft .NET Application Security warning, Setup Support Rules
verifies Internet connectivity and triggers a warning if there is no Internet
connection. The reason to check for Internet connection is "because .NET always
tries to connect to CRL.MICROSOFT.COM on startup to check signature
validation.". For more information click
here.
Neither of these warnings will prevent you from continue to the next screen of SQL Server
setup program.
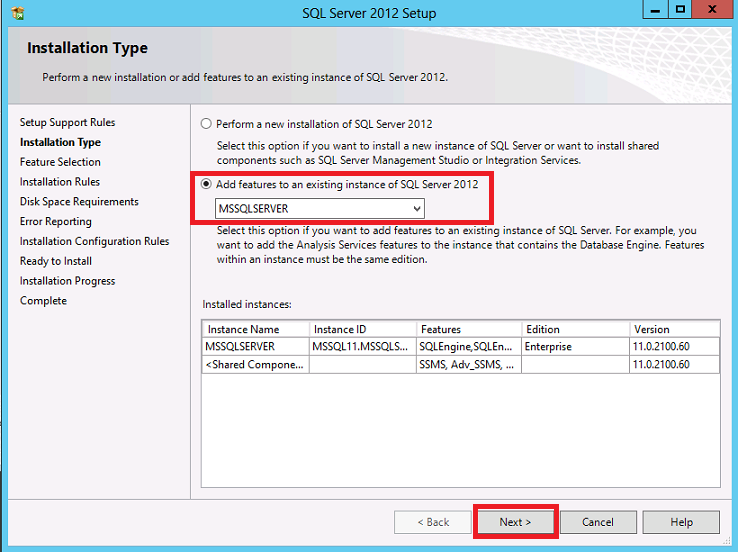
On the Installation Type screen, please select "Add features to an existing
instance of SQL Server 2012".
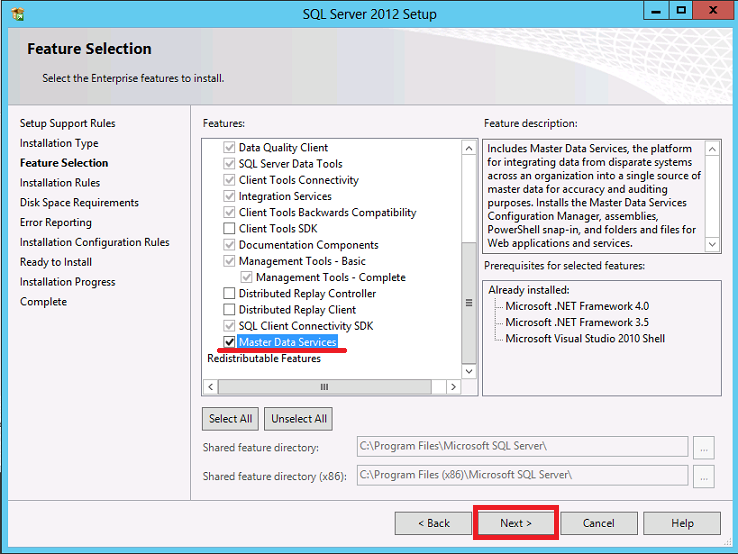
Now, on the Feature Selection page, select the Master Data Services feature.
The Disk Space Requirements page is just for the purpose of reviewing disk usage. Click on the
"Next" button to continue setup.

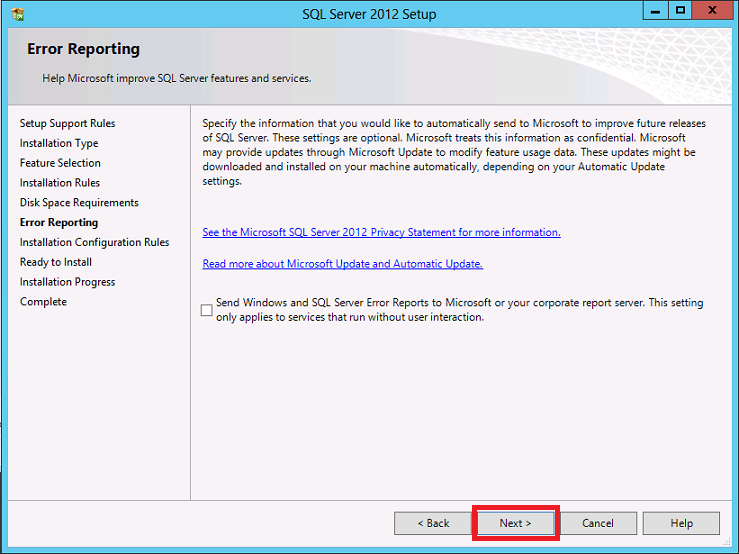
On the Error Reporting page, optionally clear the check box to
disable error reporting.
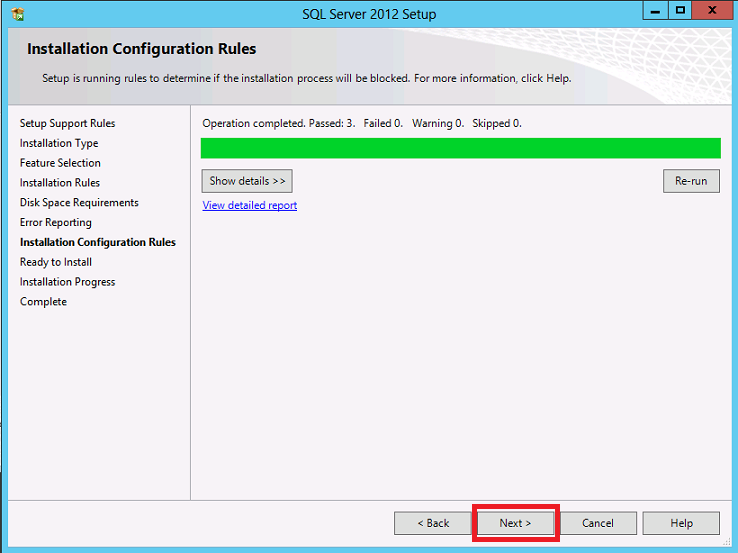
The below dialog belongs to the Installation Configuration Rules. Setup will be
running these rules to determine if the installation process will be blocked.
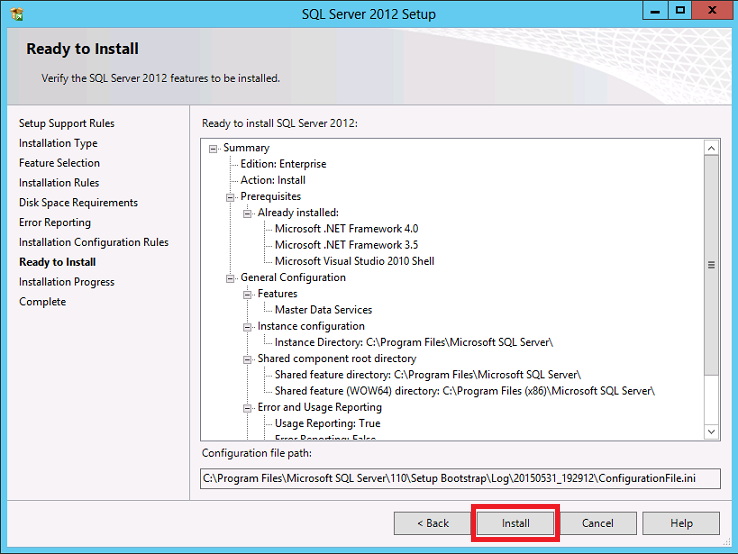
On the Ready to Install page, review the summary of features and components for
your SQL Server installation. To proceed, click Install.
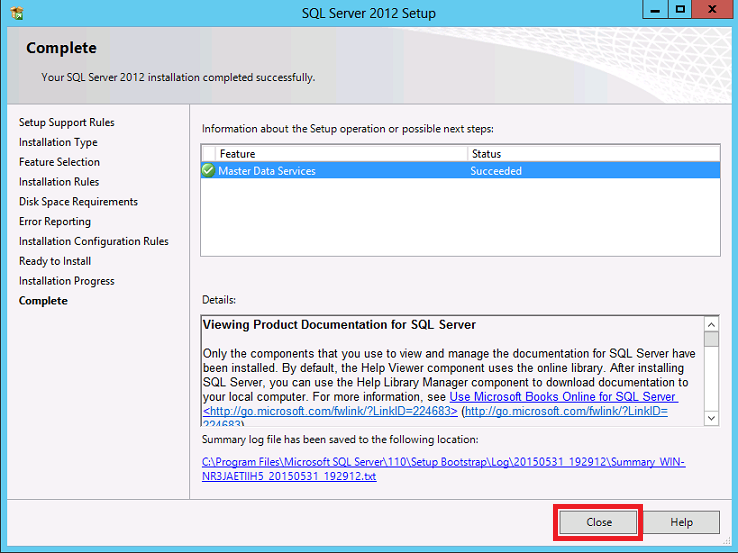
This installation completed successfully.
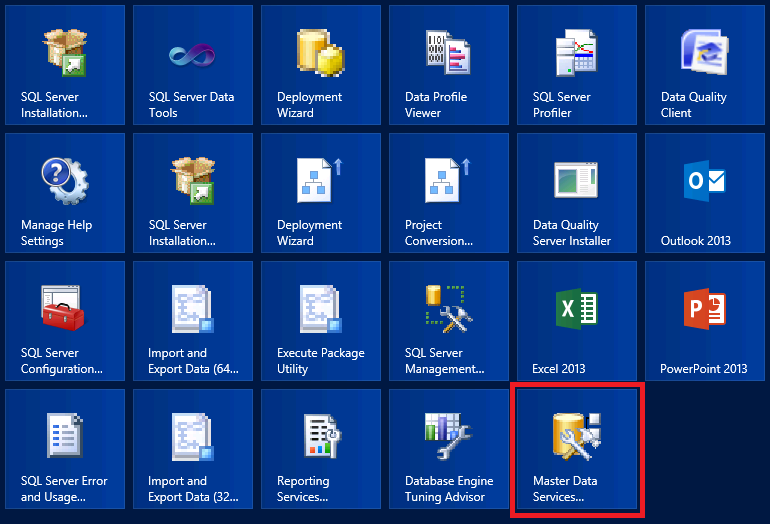
Once the installation has finished, let's open the Master Data Services
Configuration Manager.
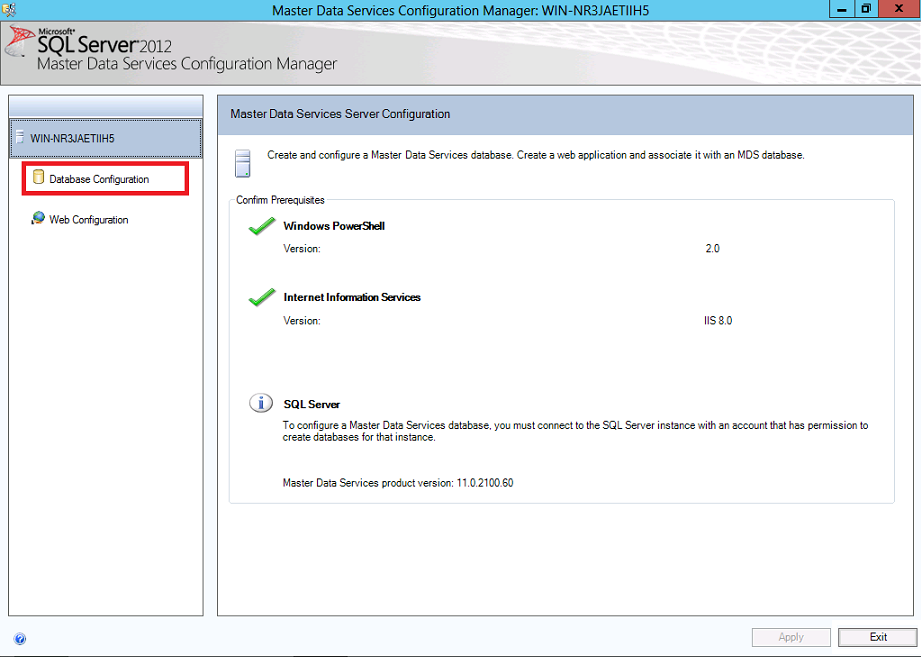
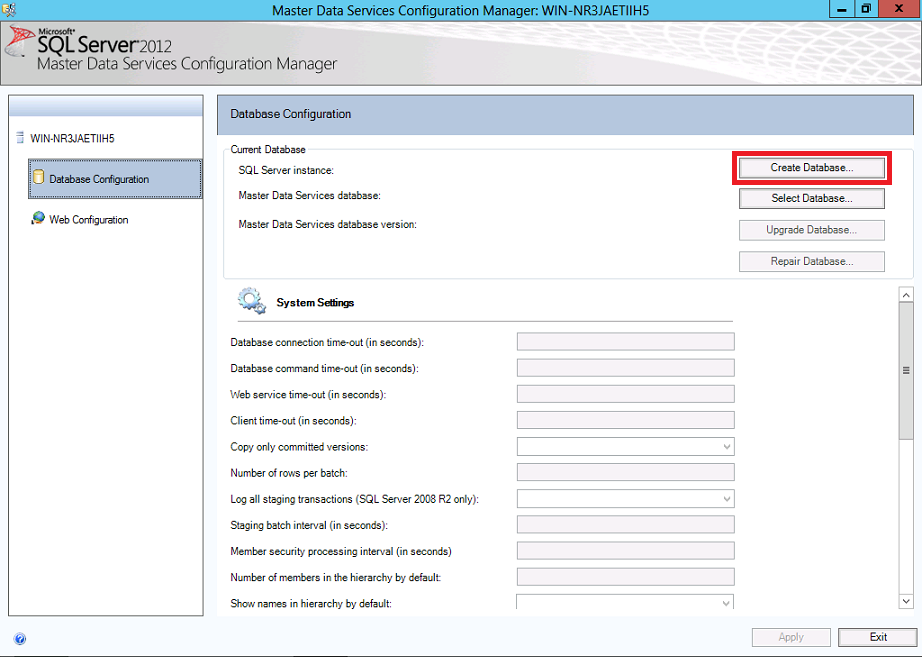
Let's proceed to click on the Database Configuration option of the left side
panel.
On the Database Configuration section, please click on the "Create Database"
button to open the Create Database Wizard.
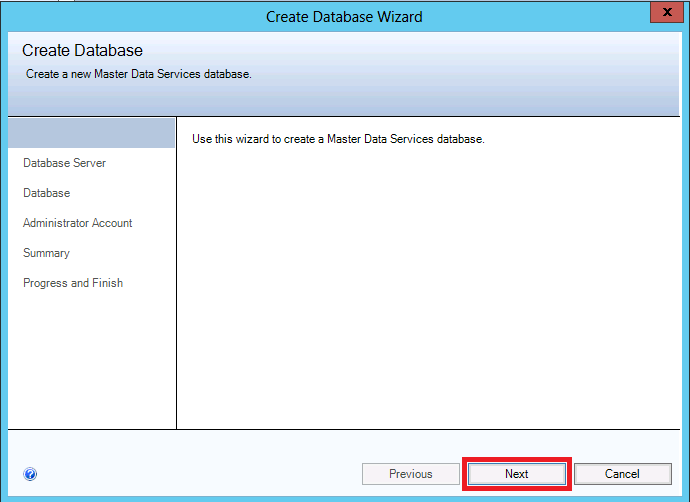
On the welcome screen of the Create Database Wizard, please click on the Next
button.
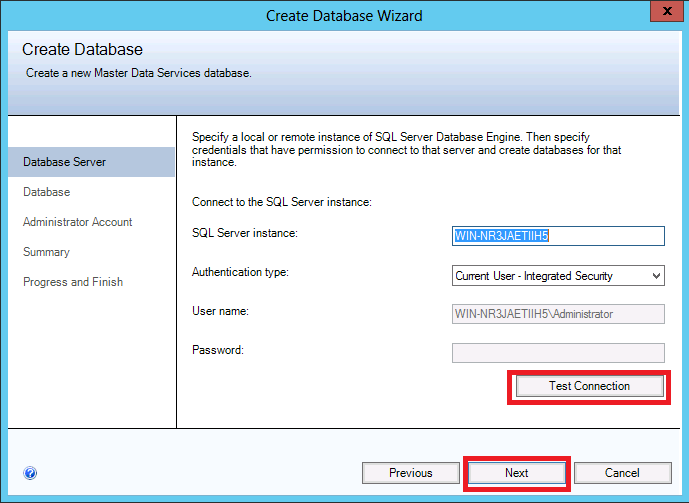
On the following screen of the wizard, you have to provide credential to connect
to the database instance with enough permissions to create the MDS database.
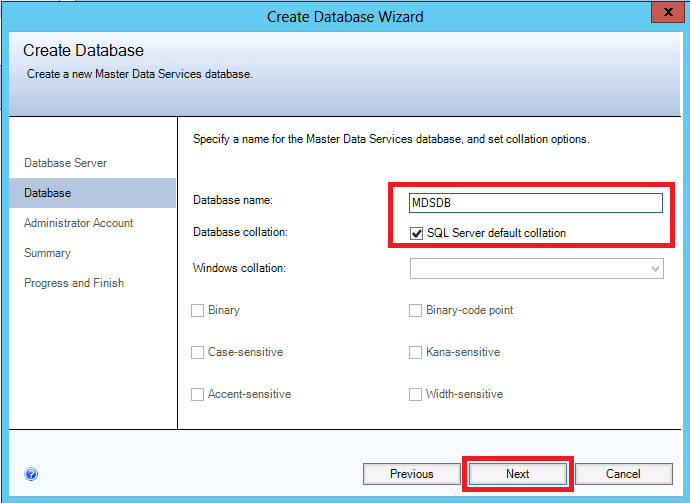
The next screen on the wizard is intended to provide the name of the Master Data
Services (MDS) database.
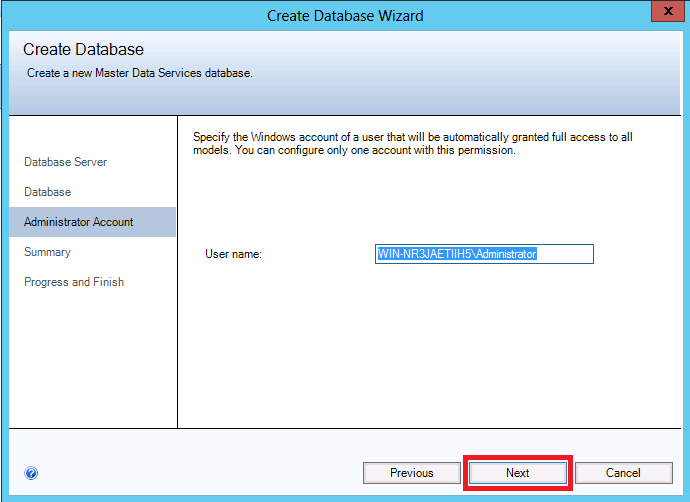
Now on the following page of the wizard please provide the Windows account that
will have access to all models.
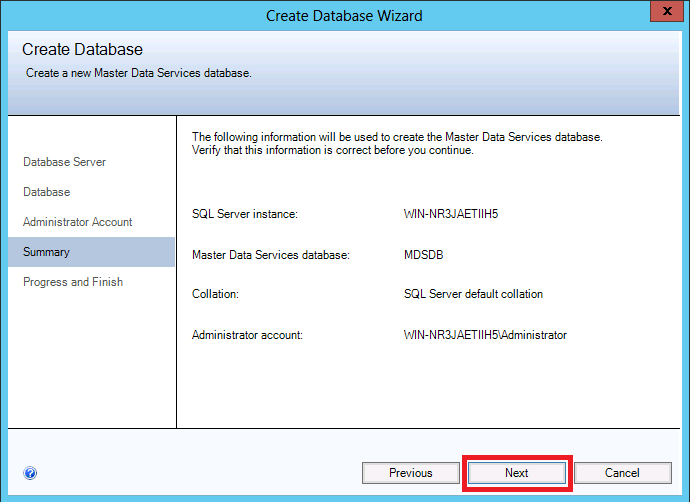
On the summary page of the Wizard just click the Next button to proceed to the
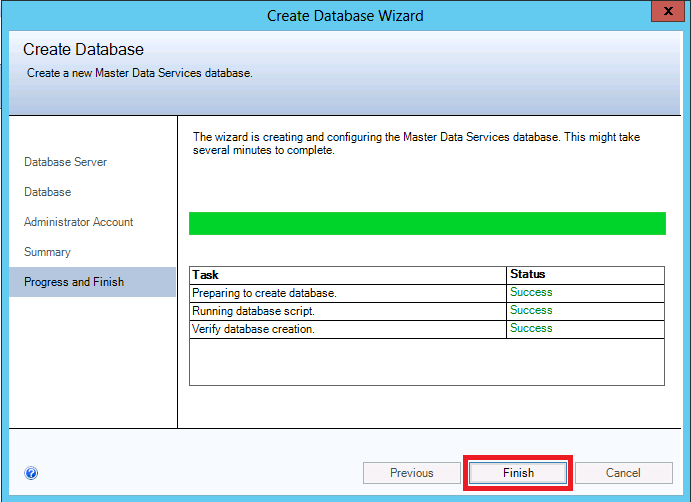
creation of the database.
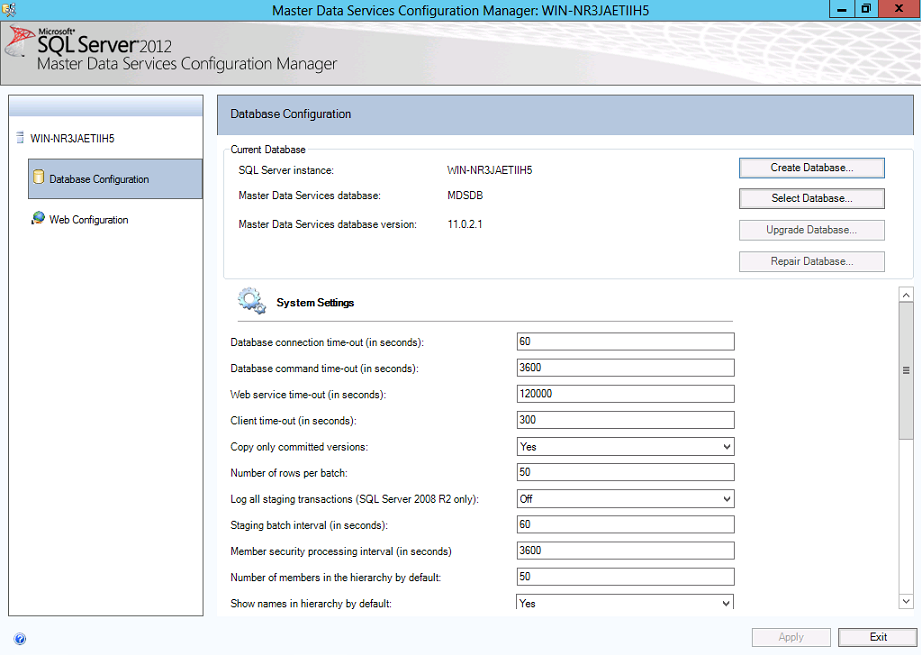
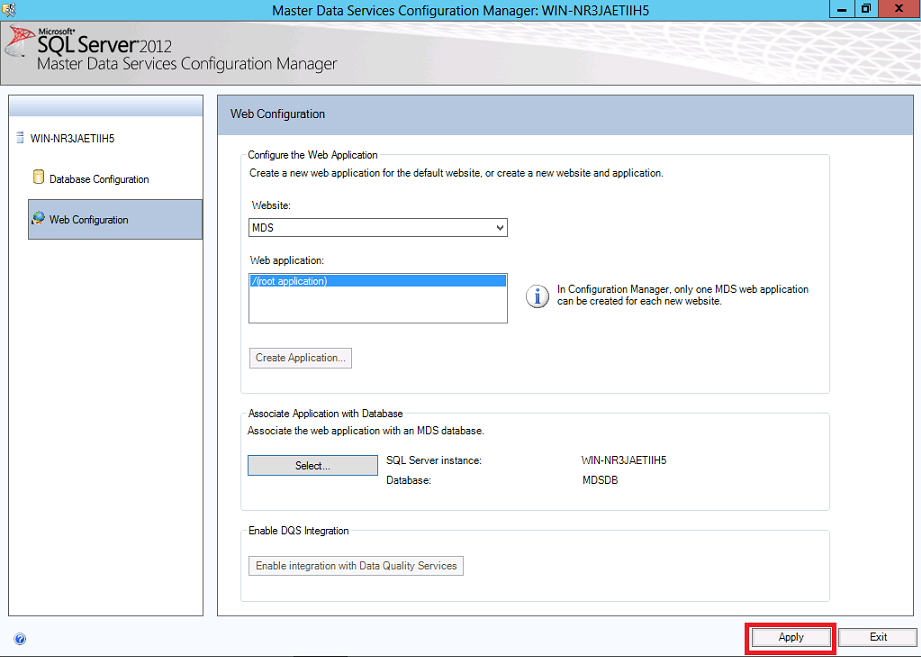
Now that the MDS database has been created, make a click on the Web
Configuration option on the left panel.
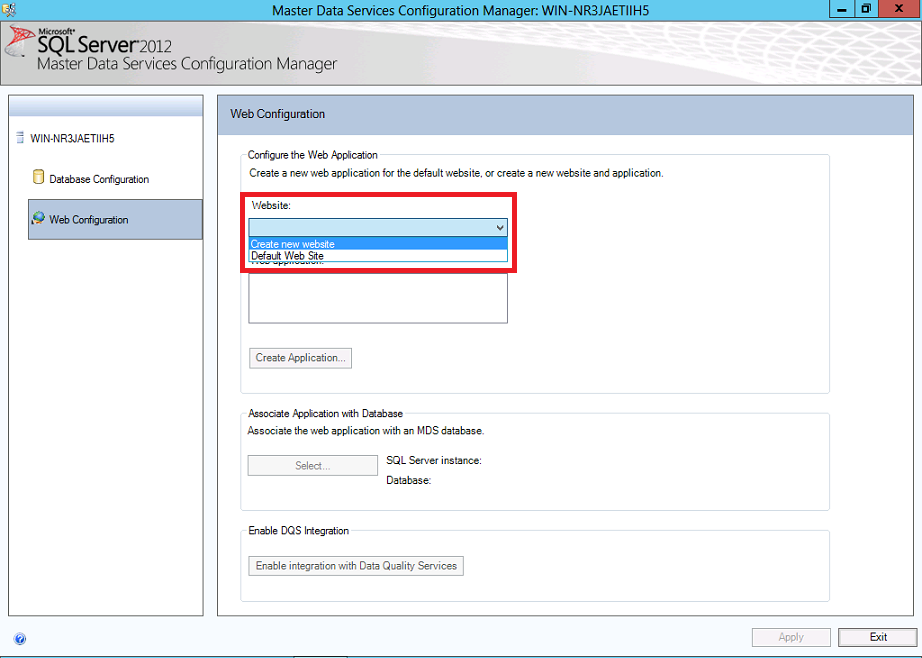
Let's create a new web site and application for MDS.
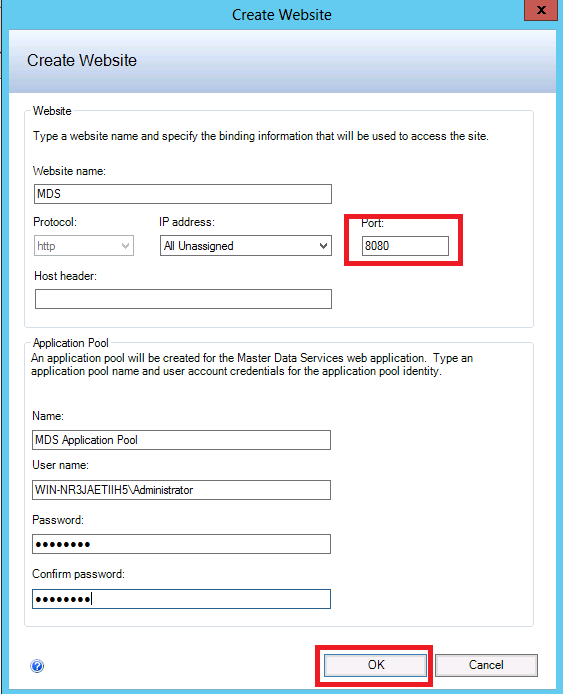
Let's assign a TCP port for accessing the MDS Web site.
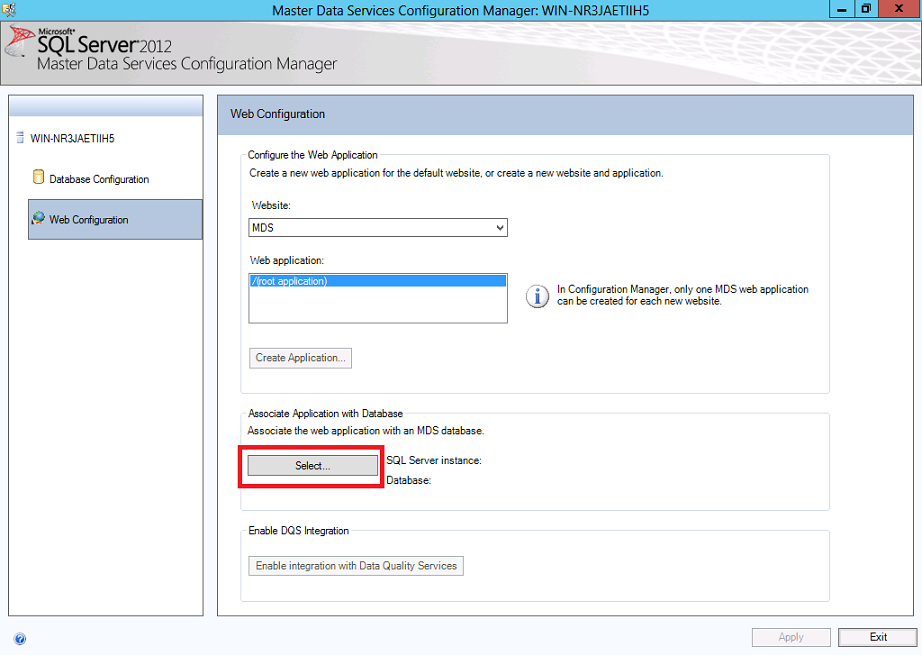
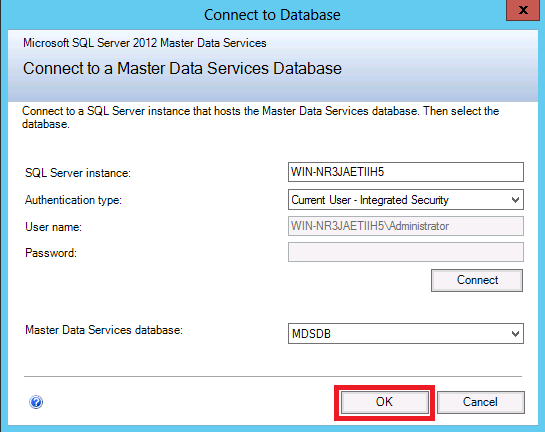
Next, let's associate the Web application with the MDS database by making a
click on the Select button.
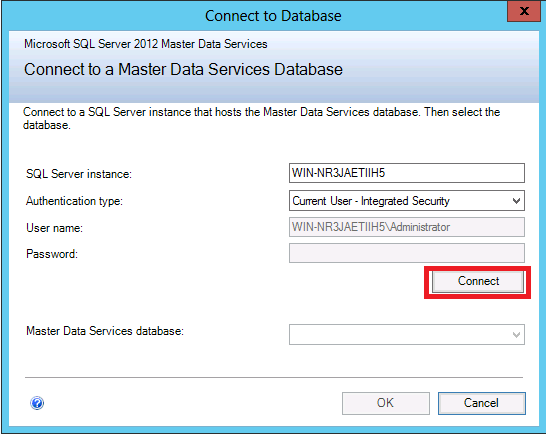
Provide credentials to connect to the SQL Server instances and select the MDS
database.
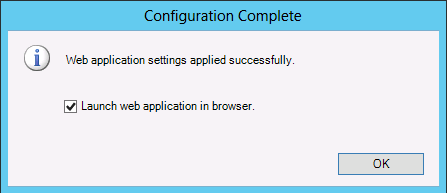
Finally, click on the Apply button to apply the Web application settings.
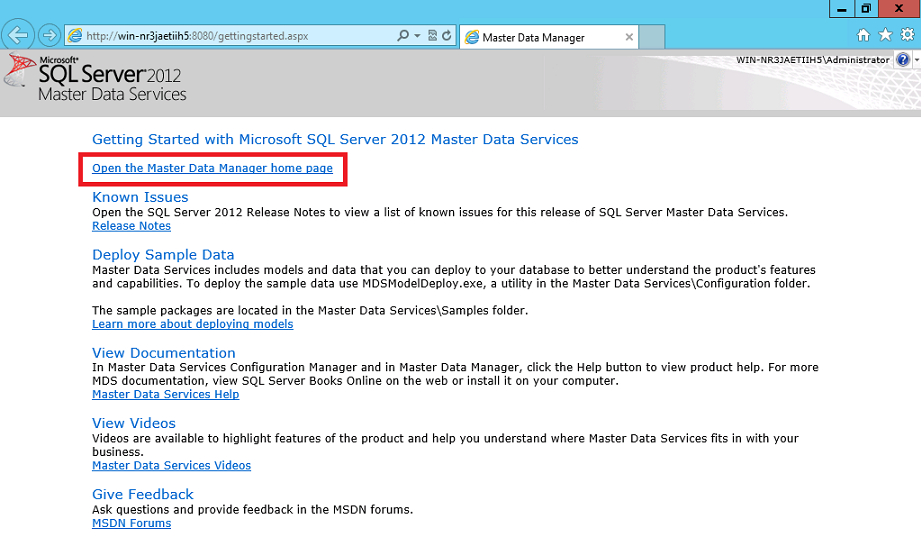
Now that we have completed the installation and configuration of MDS, let's open
the MDS Web application using the computer name and the port we assigned to the
application. Make sure you add this site to the trusted sites list on Internet
Explorer.

On the next screen, let's open the Master Data Manager Web application, where
all the MDS models should be listed.
![[Company Logo Image]](images/SQLCofee.jpg)
