How to Install SQL Server 2012 on Windows Server Core
Applies to: SQL Server 2012, SQL Server Denali, Windows Server 2008 R2
Enterprise Core with SP1.
Introduction.
Windows Server 2008 Server Core does not support .NET Framework 3.5 which is
required by SQL Server 2008, and that is the reason SQL Server 2008 cannot be
installed on that version of Server Core.
Windows Server 2008 R2 Server Core has support for .NET Framework 3.5 but
installing SQL Server 2008 is not supported on that version of Windows. However,
there are articles providing directions on how perform that installation, like
this article.
Starting with SQL Server 2012, installing SQL Server on
Windows Server Core is now supported. It can be installed on Windows Server 2008 R2 SP1 or later.
If you would like to know all prerequisites prior to install, know all SQL Server
features supported on Windows Server Core, and know all the supported scenarios, please
visit
this
link.
Steps to install SQL Server 2012 on Windows Server 2008 R2 Server Core SP1.
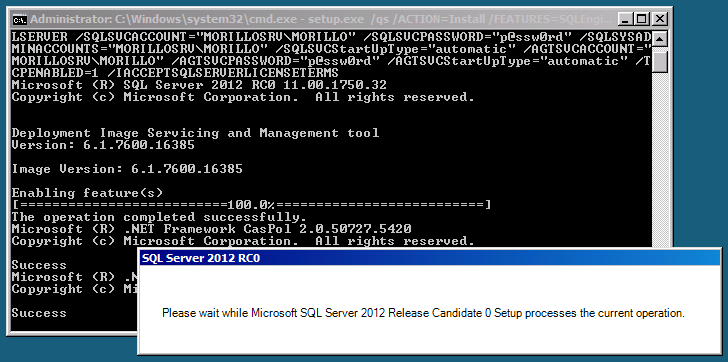
There are two methods to perform this installation: installing from the command
line and installing using a configuration file. The following steps explain
how to install SQL Server 2012 from the command line on Windows Server Core:
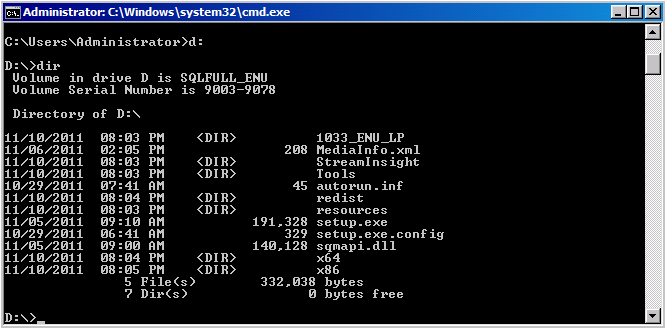
1. Install Windows Server Core. We installed Windows Server 2008 R2
Enterprise Core on a new Hyper-V virtual machine. We then added the media of SQL
Server 2012 on the drive D of the virtual machine.
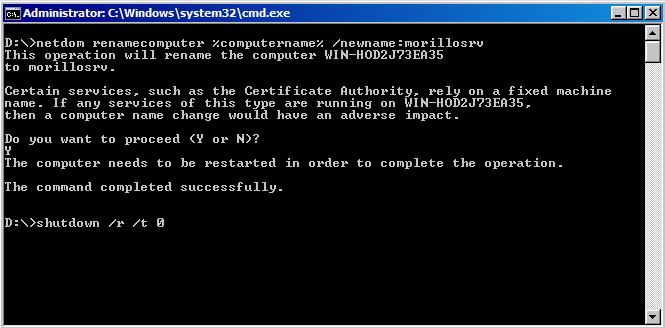
2. Rename the computer. To make things easier at the time we would like to
install SQL Server from the command prompt, we renamed the computer as shown
below and chose a name easy to remember, then we issued a command to restart the
virtual machine.
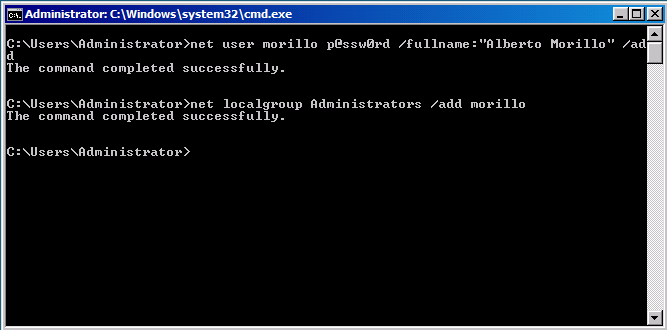
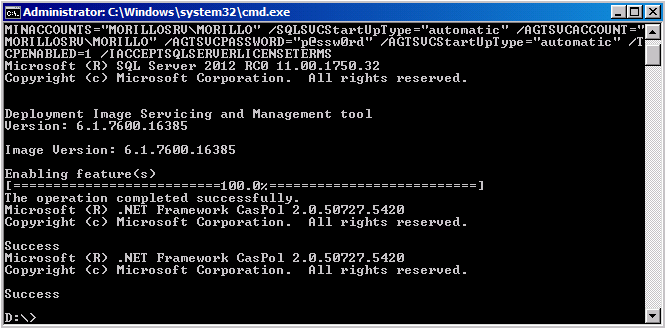
3. Create a windows account to start SQL Server services. We added the account
to the local Administrators group also.
4. Install SQL Server from the command prompt. For information about all
available parameters, please click
here.
We chose to install the database engine (SQLEngine), Integration Services (IS)
and the connectivity components.
The Windows account created above will start SQL Server Service and SQL Server
Agent, and the services will start automatically. We also added the newly
created Windows account as member of the sysadmin role on the instance.
The TCP protocol was enabled.
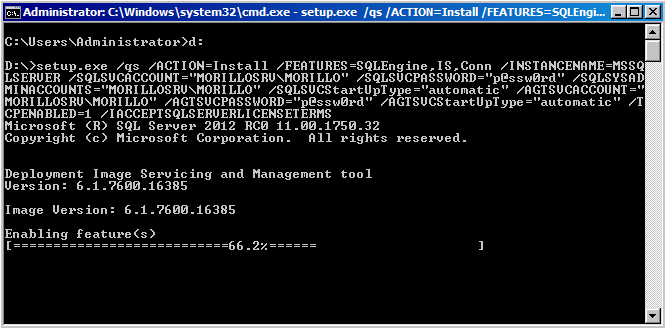
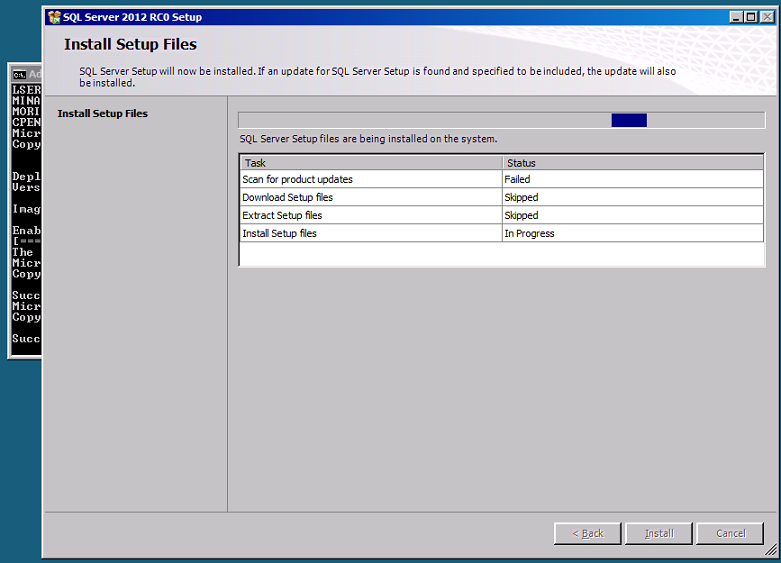
Installation is in progress.
Installation in progress. Setup is installing setup files.
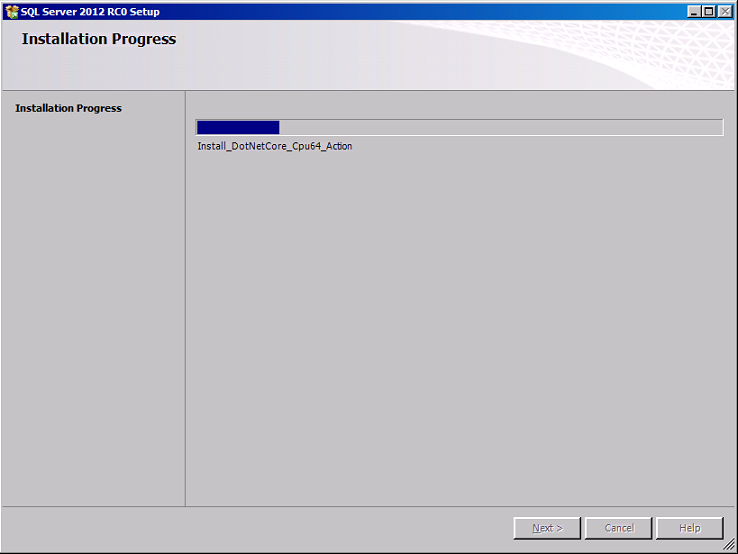
Installation finished successfully.
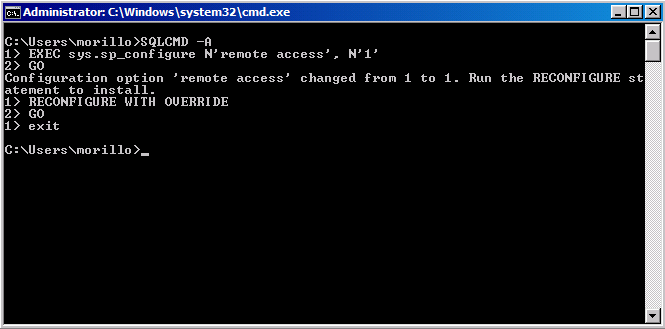
5. Enable remote connections. We logged in as the Windows account we created to start SQL Server services,
then we enabled remote connections on the SQL Server instance.
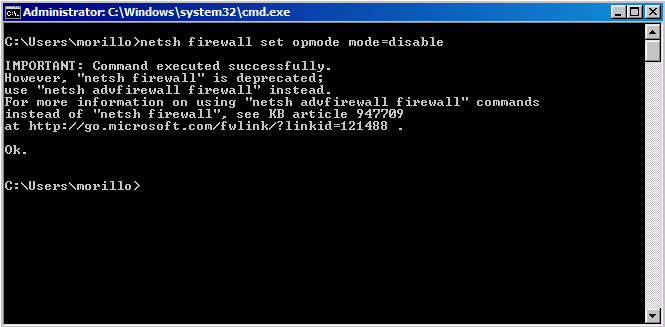
6. Finally, configure Windows Firewall or disable it. Windows Firewall is enabled
by default on Windows Vista (and later) and on Windows 2008 (and later). We
chose to disable it on this installation, as shown below.
References.
Install SQL Server 2012 on Server Core.
![[Company Logo Image]](images/SQLCofee.jpg)
