Using Geo-Replication for setting up database level replication
On this opportunity we are demonstrating how to configure Azure SQL Database
Geo-Replication. Geo-Replication is a business continuity/disaster recovery
solution that provide asynchronous replication of committed transactions from a
primary database to up to 4 active secondary (readable) replicas on the same
region/datacenter or on a different region/datacenter.
SQL Azure databases already had local replicas on the same regional datacenter
before Geo-replication, thus when transactions are committed to a primary SQL Azure
database, they are replicated to 2-3 database replicas which are in sync at all
times and,
in case of local failures, automatic failover occurs to one of the local
replicas.
Geo-Replication now allows replication outside the boundaries of a datacenter.
Essentially Geo-Replication allows replication of the primary database on a
regional datacenter to a another datacenter on another region, where a new
database will be created based on the primary and the new database will be
acting as an active secondary database, but that secondary database will have its
2-3 own local replicas on its own region too.
Benefits and advantages of Geo-Replication for SQL Azure databases.
- It provides database-level disaster recovery and is business continuity solution
with very low recovery time.
- It brings protection of SQL Azure databases (and the applications that use them) of
regional failures or against partial failures on regional
datacenters.
- Geo-Replication provides redundancy of SQL Azure databases outside of
regional boundaries.
- Applications are allowed to access the secondary database in read-only mode
and use it for querying, reporting, analytics and heavy workloads while
increasing performance of the primary database.
- It is not a premium offering anymore. It is available on the basic tier and the
demonstration on this article shows that.
- The user decides to which datacenter/region he wants its database to be
replicated.
- Up to 4 active secondary replicas are allowed to configure on Geo-replication.
- Failover from a primary database to a local secondary replicated database on
the same datacenter continues to be automatic, but failover of the primary to an
active secondary database on another region/datacenter can be done by a user or
by an application.
- We have to pay for all active secondary replicas but do not have to pay for
the traffic between the primary and the active secondary replicas.
- Geo-replication can be used to migrate SQL Azure database from one server to
another with minimum downtime.
- Geo-replication can be configured on elastic pool databases.
How to setup Geo-Replication on a SQL Azure Database.
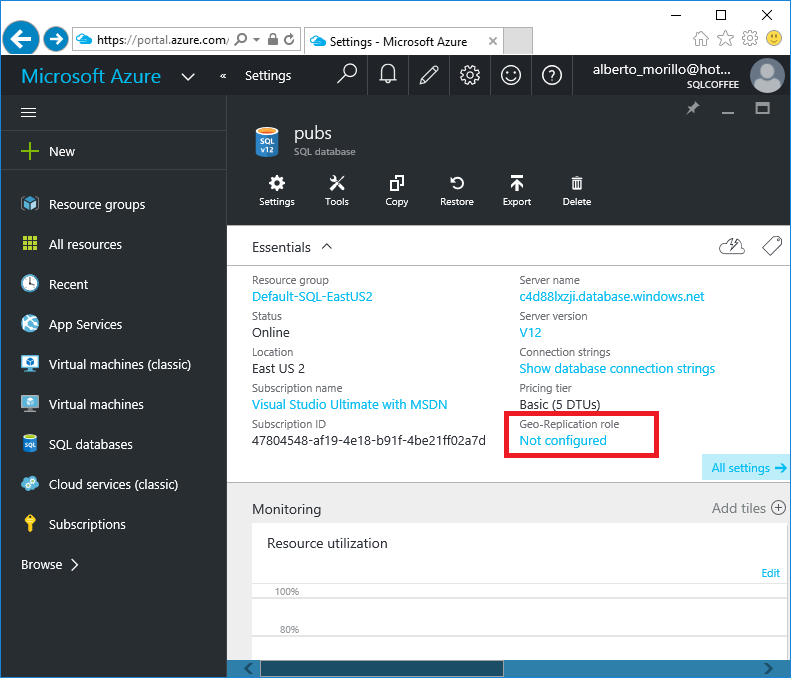
First step to configure Geo-replication is to click on SQL Databases on the left
panel menu (click on Browse if you do not see the option listed on the menu),
and then click on the database you want to configure Geo-Replication.

Locate the "Geo-Replication role" attribute of the database and make a click on
"Not configured" as shown on below image.
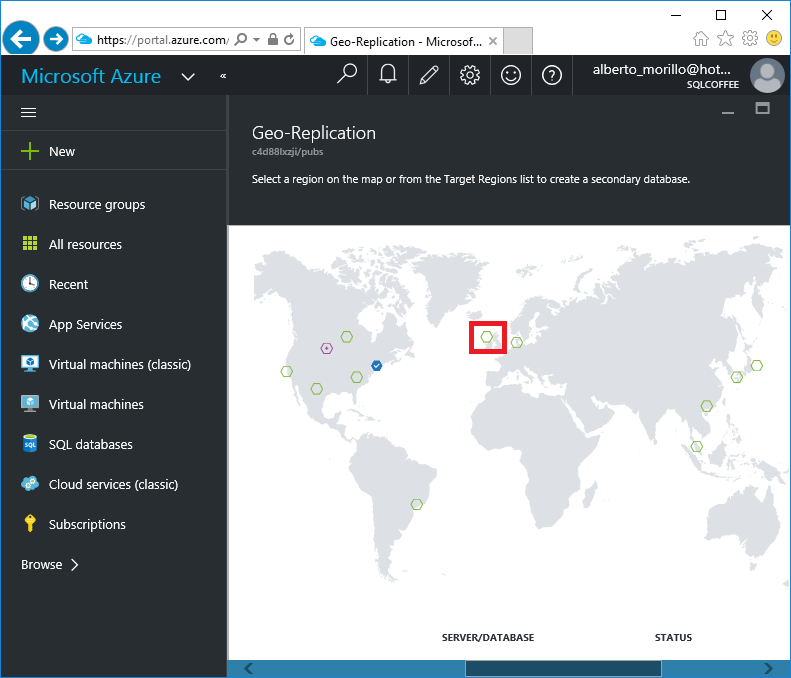
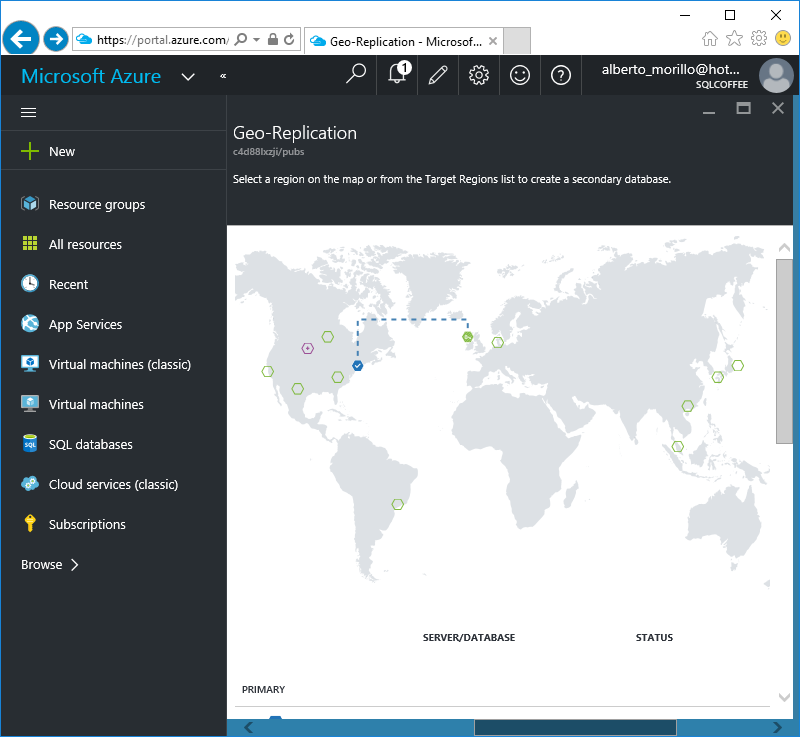
Make a click on the remote region/datacenter where you want the SQL Azure database to
be replicated. I chose one in North Europe.
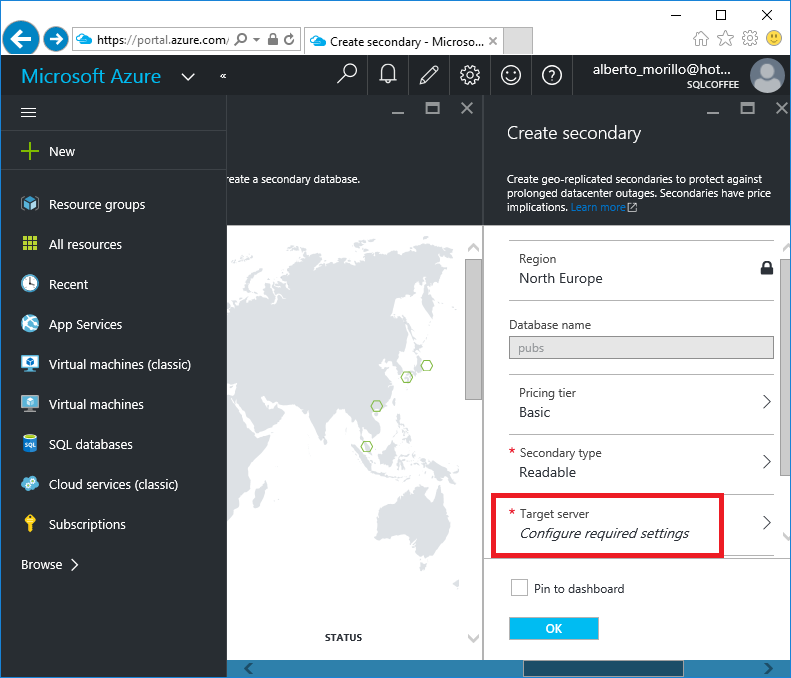
On the “Create secondary” page, make a click on the "Target server" field to
configure the new remote SQL Azure Database server.
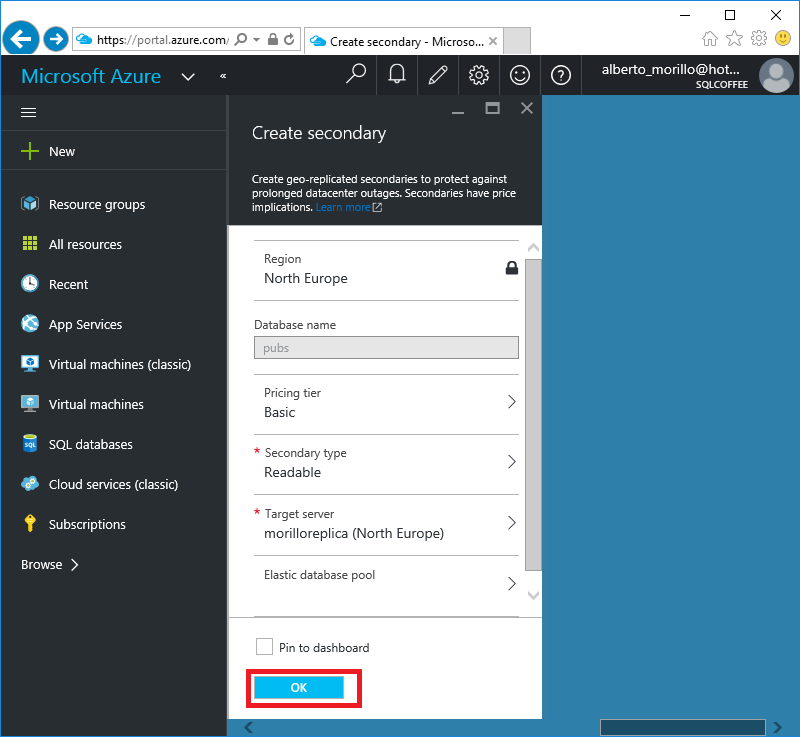
On the “New Server” page, provide the server name where the active secondary
database will be hosted, and the name of the login and password for the server
administrator. Leave the default values on other fields of this screen and then
click on the “Select” button.

Back on the Create Secondary screen, only a click on the “Ok” button is needed.
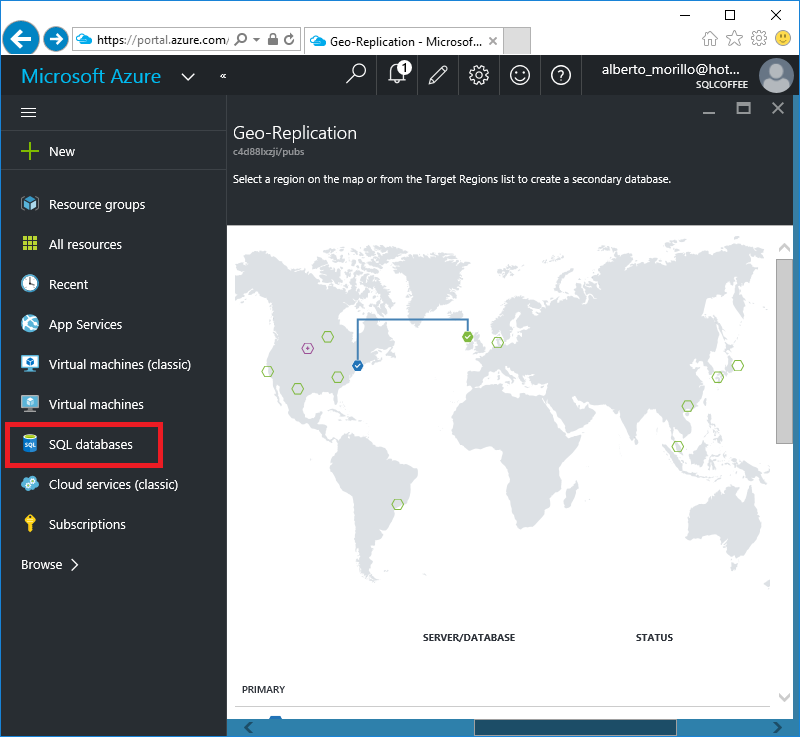
The next screen shows the replication already set, with the primary database
blue colored and the secondary active replica colored solid green.
Now let’s make a click on the option “SQL Databases” to see how are listed the
two databases involved in the replication.
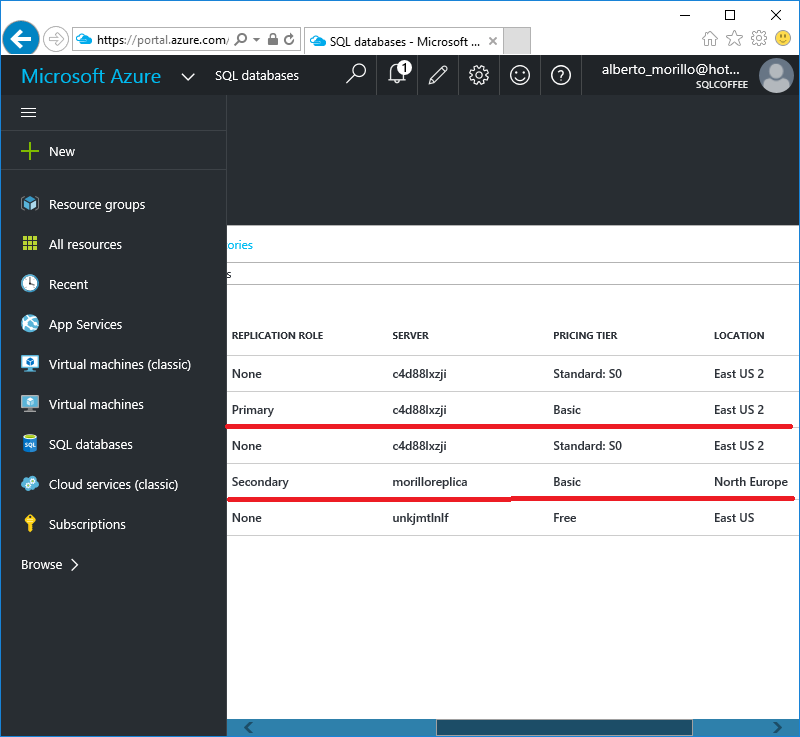
As you can see below, the replication role for the original database is now
configured as "Primary" and the active replica shows "Secondary" as role.
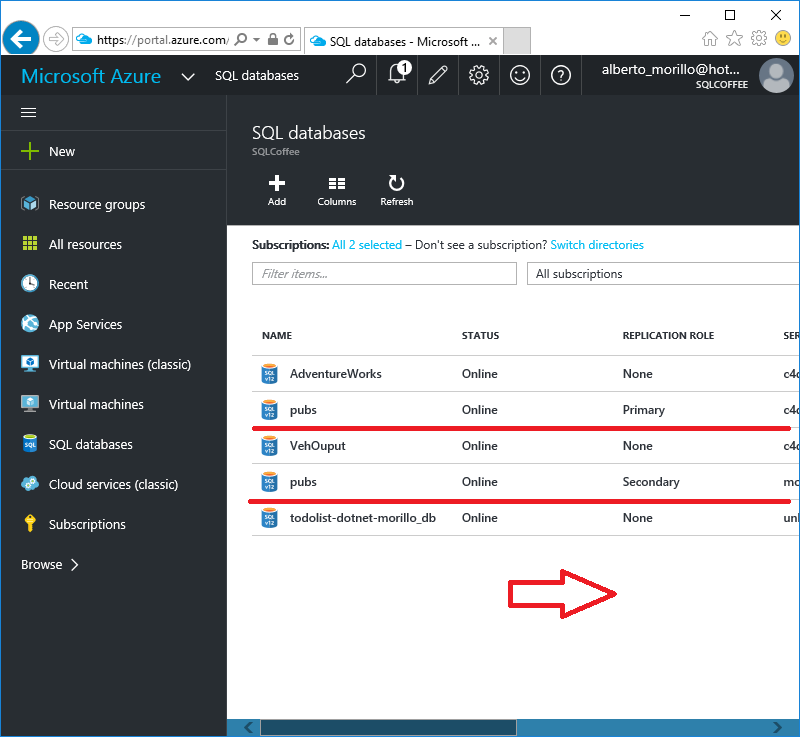
Scrolling to the right in the Web Browser shows where the 2 databases are
located
How to perform a manual failover to the active secondary SQL Azure database.
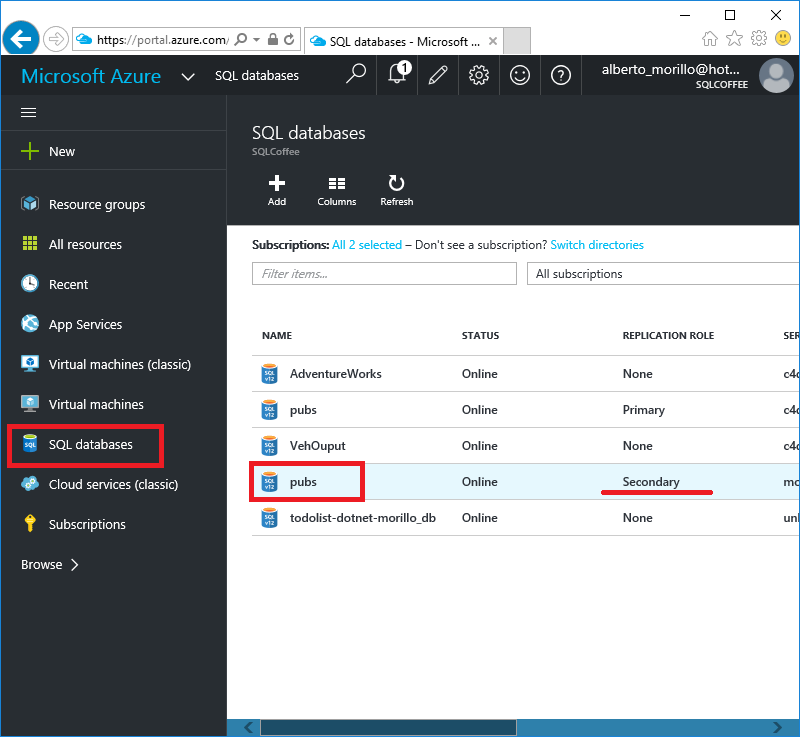
To perform a manual failover, let’s make a click on the option “SQL Databases”
of the left panel menu, then make a click on the active secondary SQL Azure
database.
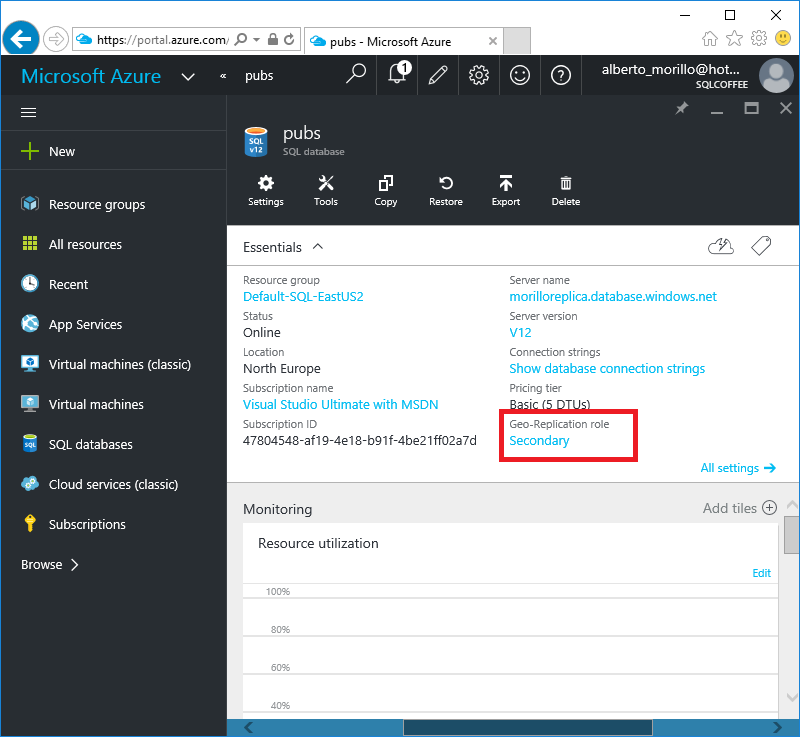
On the "Essentials" section of below screen, locate the "Geo-Replication role"
screen field and make a click on "Secondary".
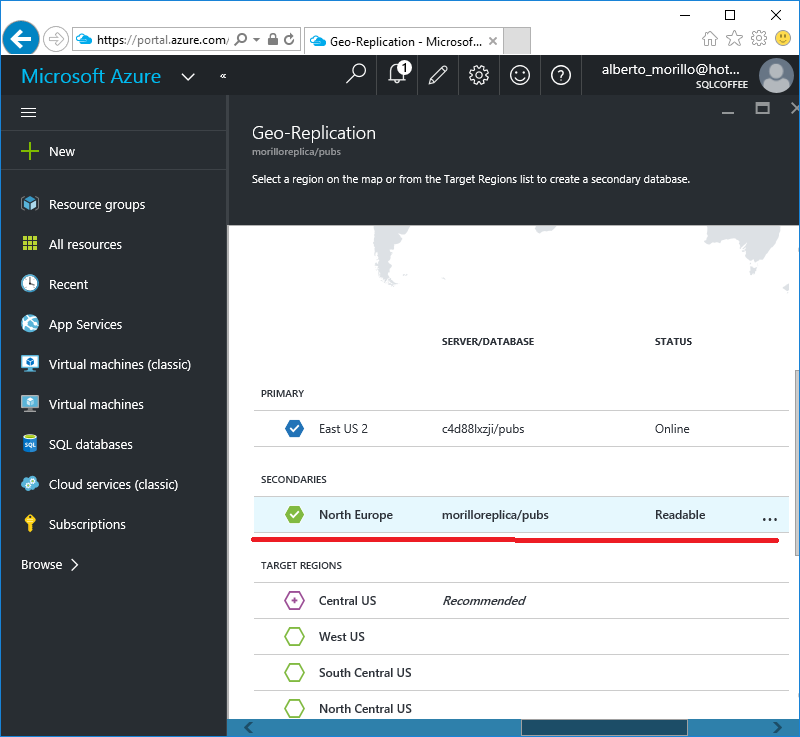
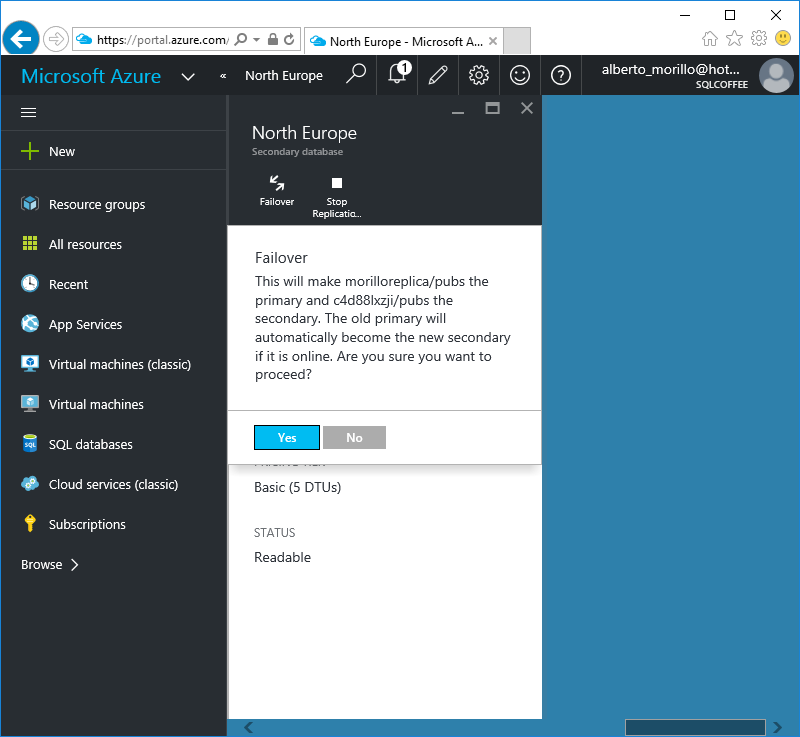
Choose the replica you would like to failover to from the list of "Secondaries".
In our demo we chose the North Europe replica.
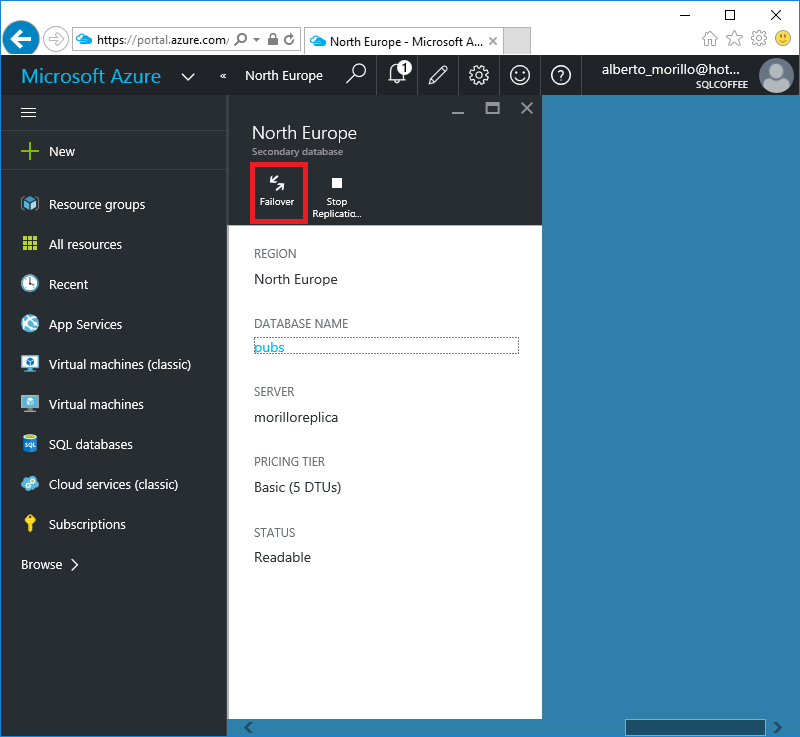
To trigger the manual failover to the secondary active database just make a
click on the "Failover" button shown below.
To proceed with the failover process, make a click on the "Yes" button.
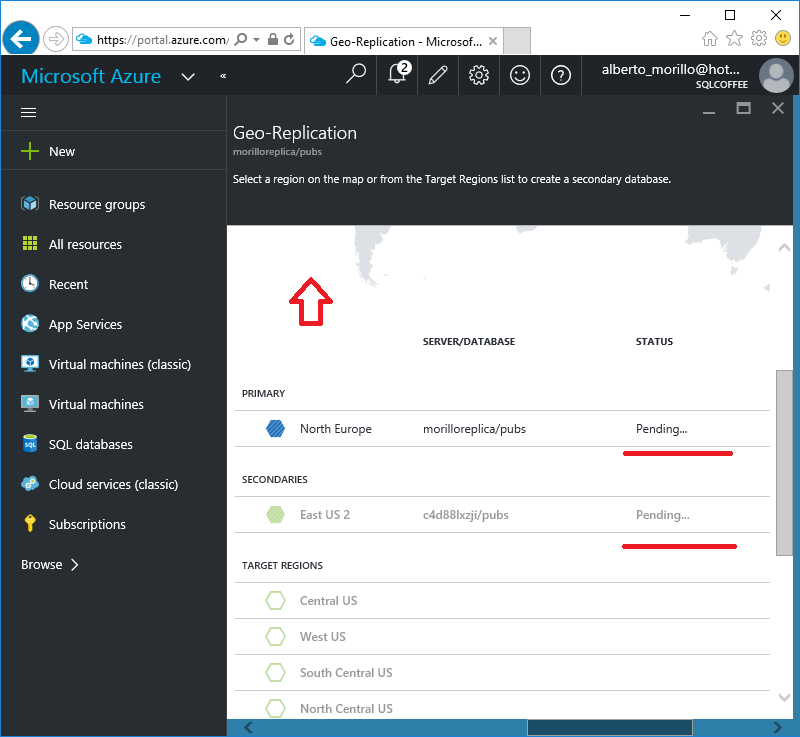
As you can see on the image below the failover process started and the databases
are showing a pending status. Let's scroll to the top of the Geo-Replication
screen to see the changes on the replication map.
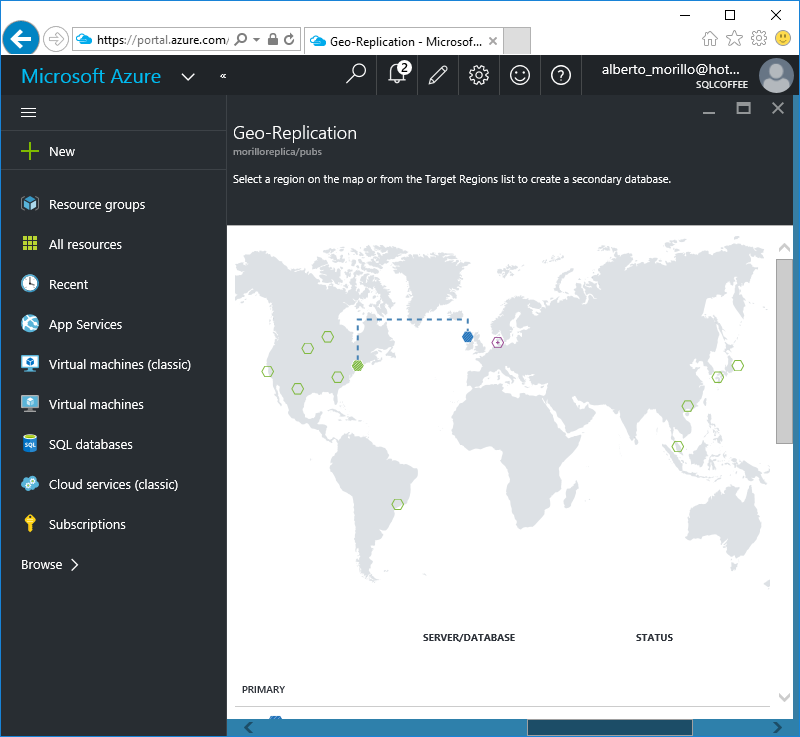
The map now shows that the once secondary active replica is now the primary
database.
![[Company Logo Image]](images/SQLCofee.jpg)
